Ever wanted to see inside luxury ready to wear and compare the construction techniques to yours? Here is a glimpse inside a few pieces of Chanel and other luxury garments. These aren’t technically couture as there are no fittings and they aren’t made for an individual client but some of the techniques are worth considering using in your sewing.
I found more hand sewing than in most ready to wear. The hems are sewn by hand using a catch stitch. Jacket linings are completely sewn together before inserting but are hand tacked along the shoulders and underarm point. The jump pleat at the hem is slip stitched by hand.

Closeup view of the jacket hem. Notice the hand stitching and how it is placed.
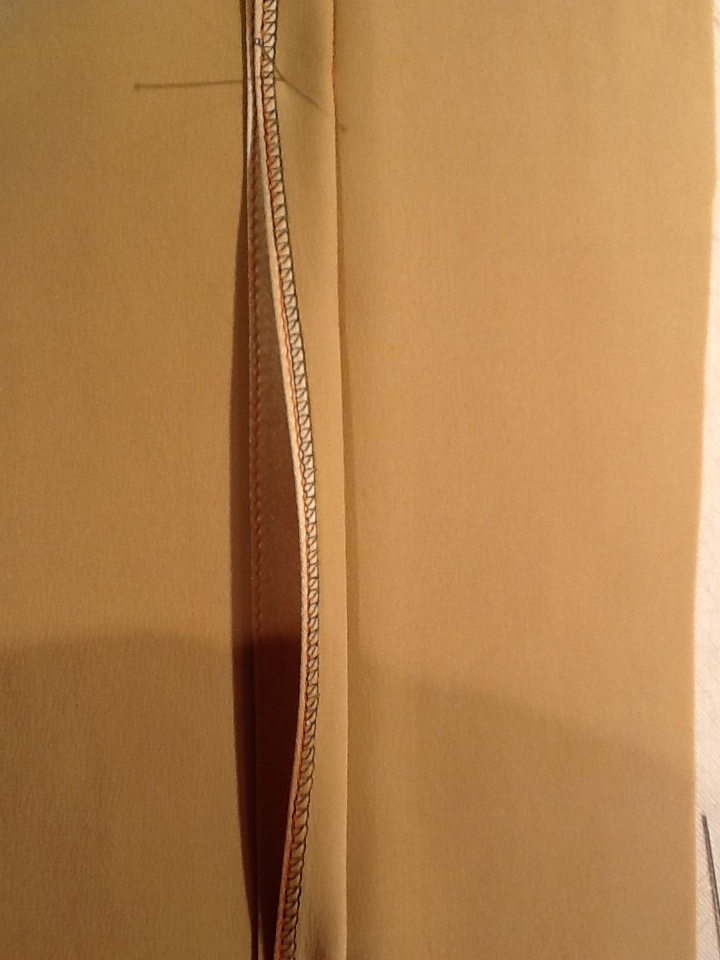
I noticed loads of serged edges. All garment and lining pieces are individually serged along all sides(except the armhole seam). In couture sewing, sergers are generally a big no-no. Raw edges are hand overcast but how time consuming is that! The difference is that an extremely fine thread is used; no wooly nylon or what is sold as serger thread.

The pockets and pocket flaps on this Chanel dress were slipstitched by hand. They are removed here for alterations.


Here is a Pucci dress using the same fine thread to finish the seams.

Also note the wide seam allowances. Most are at least 3/4 inch and some are 1″ to 1 1/4″. Linings have the same generous seams.

So what kind of thread and where to buy? Oshman Brothers in NYC is one source. You are looking for Gutermann Skala U81. I also have the U151 which is slightly thicker but the U81 is the thinnest thread I have ever seen.
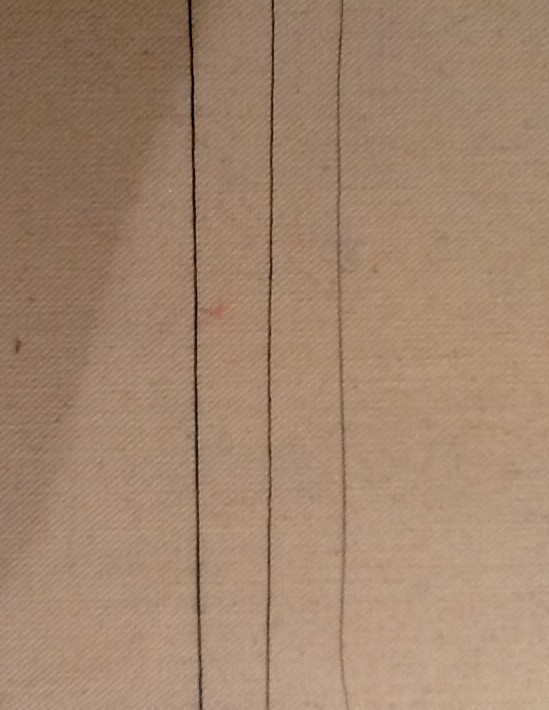
The thread on the left is Gutermann 100 sewing thread, middle is Skala U151 and right is Skala U81.
Another source is Bergen Tailor Supply.
Also you need to set your serger for a narrow three thread stitch. On mine this is done by removing the left needle and using the three thread narrow hem but loosening the tensions. You’ll need to play with your serger settings and once you discover what works, write it down. I have it on a post-it note next to the machine.
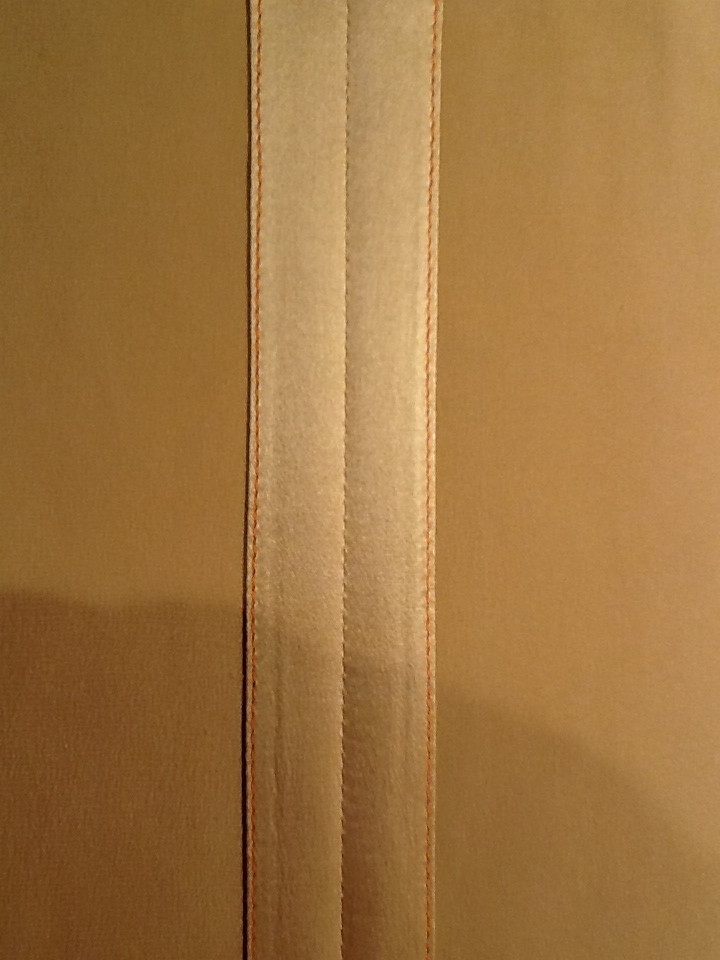
For unlined garments I noticed the edges were serged, turned under and stitched. Here is a test on silk charmeuse using the Skala U81 thread.

The serged edge is turned to the wrong side and edge stitched.
Finished seam pressed open. Put strips of brown paper under the seams to prevent any press marks on the right side.
This seam finish wasn’t limited to silk blouses. Here is an unlined Chanel jacket of silk and linen check. The jacket seams were serged, turned under and stitched. The sleeves were lined to make the garment easy to slip on and off.

Sleeves are a whole topic of their own and I will delve more into that with the next post. Interesting the way the top sleeve seam is pressed open for about two inches each side of center at the sleeve cap. The armhole is stayed with narrow, lightweight bias tape and the shoulder pad incorporates a sleeve head.

Exploring the Chanel shoulder and armhole led to a self-taught course on sleeve drafting, fitting and how to achieve that high, slim Chanel sleeve. More about that to follow.
Meanwhile I did manage to get Style Arc Franki dress finished and incorporated some of my new-found finishes.

I used a linen knit and lined with bias-cut silk charmeuse. The lining extended to the armhole edges where it is fell stitched, eliminating facings. I used the fine overlock thread for seam finishes and also used it for a slipstitched hem on the silk lining.


Hope you enjoy. Mary
Thanks for that revealing peek inside those designer garments, Mary. I’m looking forward to your post on the Chanel armscye, too, which really makes those jackets. It’s those details that make the difference!
The armseye and sleeve fit were critical for Chanel. So much info and I’m finishing the drafts and comparing sewing patterns to the RTW Chanel.
How interesting! Thanks for the posting and the brown paper tip!!
Glad you liked it and hope you found some helpful info.
Thanks for a really enlightening post. I’m always fascinated by what is inside a garment.
Thanks. There is so much to learn from dissecting quality garments. Many details I’ve seen never appear in any sewing book.
How on earth did you get to noses around to this extent ? I am very glad you shared with us . I wonder if a monofilament would work
A friend needed extensive alterations so I had total access to the clothing. Some pieces needed to be totally taken apart. I’m hesitant to use monofilament thread. The mono I’ve seen is thin but stiff and I’m not apply with how it behaves. The Gutermann thread was much softer and also behaved when used to hand sew. It’s also semi-transparent so color matching isn’t that critical. I bought white, black and medium gray.
Thanx for the thread weight info for serging and the photo examples.
Will definitely use the serge and fold seam finish; looks so neat and eliminates possible serger thread snagging as it rubs against body and/or undergarments.
I never knew this thread existed until I saw it used in these garments. Hope it helps in your projects.
As always Mary, you offer insights at a level above the run of the mill. The whole perfect shoulder/armscye/sleeve is a current obsession of mine, so waiting with anticipation your next post! Notwithstanding all the talk on the blogosphere about ‘couture’, I think most of us could learn something from the techniques of high end RTW! Thanks again for sharing your knowledge”. Cheers, Robyn
The first post regarding sleeves should be ready to go this week. It has been a month of intensive research and I didn’t want to post until I had some of the details thoroughly ironed out. I’ll be awaiting feedback as I think I’ll cover some new topics.
Thanks Mary, for your post – I saw this ‘folded-back and pinstitched’ approach many times with retro and vintage garments when I altered/mended/remade them for a living. Interesting that they combine the serging with it. I’m curious about the corners and the thread finish there though; the corners all look very neat from what I can see. Would you say they just neatly turned the corners when serging, or ran off the fabric, lifted the foot and turned the corner and then started again (as is the most common way of serging that I’ve seen) – and then did something with the thread tails at each corner?
The majority of garment sections are serged by starting at one corner and sewing around the entire piece, turning at the corners. That way loose threads at the corners are eliminated. It makes for a very neat interior and easier alterations.
Hello Mary, It is such a pleasure to read your posts and learn from the clear articulation you contribute over so many useful topics. The dress in this post is beautiful, classic, elegant.
I was interested to see you used a silk lining with the knit fabric. I have been doing research around what to line knit with – and have been wary of stepping foot in the experimentation pool. What I’ve read, before this blog post, was to try using another knit to line a thin knit…That doesn’t sound smooth or beautiful! However, I LOVE the idea of using charmeuse silk from my stash if it won’t have the knit fabric part of the garment stretch and “sag”.
I wanted to ask, do you have a source for tips around using silk in this way with various knits?
I’m happy you found this interesting. I cut the silk charmeuse on bias grain and it worked wonderfully. I think you could also use a thin jersey type knit for lining as long as it doesn’t catch on the outer fabric. I don’t have any specific source. I use what experience has shown to work.
Ah, on the bias – makes complete sense! I’ve used charmeuse under chiffon as a lining, and it happened to be on the bias in that garment, but it hadn’t occurred to me that would be the ticket in lining a knit. I’m looking forward to using this approach.
What do you use to stablize the neck and armhole…and did you do anything specific to “smarten” the hem. (That term “smarten” seems to come from a New England seamstress who I learned a great deal from, but I don’t know if it gets used anywhere else!)
Thanks for the link to the thread. I’ve got some on the way and am eager to see how much better the finish will be!
If you need to stabilize an edge try using bias strips of China silk or cotton viole. I cut strips about 3/4 inch wide, steam and stretch to the maximum, then use as stabilizing tape. The slight amount of bias remaining will ease around shapes better than a straight grain strip. I’m not familiar with the term “smarten” in sewing. I hemmed by hand to avoid stretching the bias hem.
Thank you Mary, I’ll incorporate this. Then, on hemming the knit layer of fabric, other than using the specific thread mentioned, did you treat the hemline with anything tho help it keep the shape?
No. This was a relatively stable knit so hand stitching worked fine. Nothing else was needed to stabilize the hem.
HI Mary, Thank you for all this information – I am collecting it for the day I make such a jacket. I have a question regarding your linen knit dress – your knit appears to be heavier than most of the linen knit I’ve seen. I have been looking for a heavier linen knit – do you remember where you purchased it?
Thank you,
Sue
Thanks Sue. I think the linen knit was from Mood Fabric in NYC.