Now that my body double dress form and three piece sleeve research are complete it’s time to try them in action.
This is from my stash, probably purchased at B&J Fabrics several years ago. Now seems like a good time to get it made. Another hallmark of couture construction is the shaping of garment sections with steam before any sewing takes place. “Vintage Couture Tailoring” by Thomas von Nordheim has probably the best diagrams of how to shape jacket and sleeve sections. Claire Shaeffer’s videos also explain the process well.
If you haven’t seen it, the video “Secret World of Haute Couture” is a great watch. It’s about 45 minutes and interviews some of the purchasers of haute couture garments. Although these ladies don’t sew they do understand and appreciate what haute is and how it feels. About 10 minutes into the film, one of the ladies who worked in haute couture for years explains, “You don’t just cut the fabric and sew it; you work the fabric. It is shaped with special irons so that when you roll it up, pack it, etc it still looks perfect.” The importance of prefect fit is also stressed; “the clothing fits like a second skin; feels like you are wearing nothing at all.”
I used Vogue 8891 as a starting point. I reshaped the front princess seam so it would be easier to shape a rectangular piece of fabric into the proper shape.

Trace the grain line about one inch from the fabric edge. Place your muslin pattern (no seam allowances) on top.

Smooth the fabric so the grain line follows the pattern shape. You will notice ripples form; these need to be steamed out so the fabric is now shaped like the pattern.

The same process needs to be done on the back sections.

l
And all sleeve sections are steamed to further build in the shape.

Although Claire’s pattern instructions don’t specify this type of shaping, notice that what was a curved quilt line now tends to follow the grain of the shaped garment sections. I spaced my quilting lines about 1 and 1/4 inch apart and followed the lengthwise grain on each section. After quilting I like to roll the raw edges of my lining sections under; it just keeps things neater.

I cut the sleeves after completing and fitting the jacket body. Pins show match points. Most boucles do have a subtle pattern, so look carefully if you think yours doesn’t.

Almost completed. Here is the jacket front and back. Notice how the armhole has been eased and tightened before the sleeve is set.
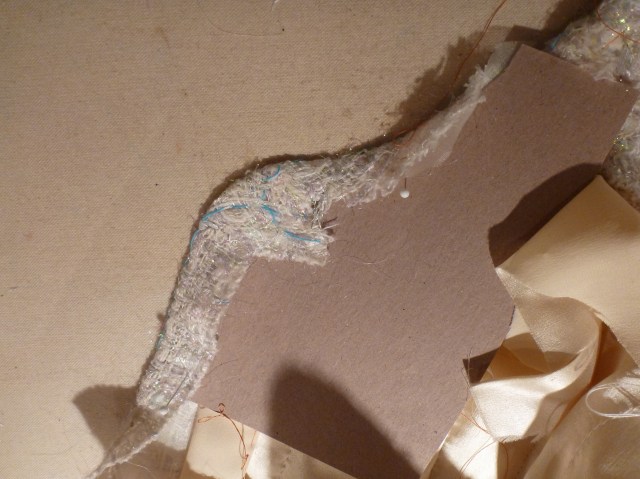
I decided to shape the upper neck edge. An easy way to get a smooth shape that is symmetrical is cut a cardboard template. Press the neck edge under. Flip the template for the other side.

Needs sleeve buttonholes and a good final press before I’m ready for trim.

Pockets? Undecided yet. I’ll wait and see what the trim and buttons look like first.


Looking very good. I like the idea of using a cardboard template to get the neck shaping right. Thanks for the tip!
Thanks. Hope you can use it in your sewing.
Wonderful! Love these couture techniques. I was just thinking of satring working on my new jacket. Thanks for sharing your progress.
Will be watching your blog for progress. Thanks.
Its looking beautiful and such an interesting post about the techniques too.
Still looking rather plain but the buttons and trim will bring it to life. Thanks.
I love reading about the construction of these jackets. What is it about them that is so alluring – almost magical? Am waiting with bated breath to see your trim and buttons!
There must be dozens of blogs about making this jacket with all its’ variations. It is timeless and every version has something different. Perhaps that’s why we are drawn to this style. Working on the right trim.
Just googled the Vogue pattern – was it 8891 or 8991… I love the neckline!
Am so loving learning about couture.
Sent from my iPad
>
Whoops. Just corrected the typo. It is pattern number 8991. Thanks. The world of couture is fascinating.
Wow, it looks like it is going to be super comfortable. Brilliant.
It feels more like a cuddly sweater than a tailored jacket. Thanks.
I’m always watching for your new projects. This jacket can be made multiple times and always look new.
Wow, so many great tips in here, Mary! I love the idea of having the grainline follow the pattern line. The cardboard template is brilliant, too. God knows that boucle is tricky, so those are good ideas for keeping the shaping.
Im playing around with other ideas on reshaping garment sections to follow grain line. Cardboard templates are also great for shaping pockets and keeping them symetrical.
Thankyou for the tips. Your jacket looks fabulous.
I’m in awe!
Thanks.
This post is so informative and helpful. Thank you!
Glad you enjoyed it. Thanks for letting me know.