How many sewers have difficulty with the fit of pants? The sewing is relatively straightforward; only two fronts, two backs and a waistband or facing. The truth is that pants ARE hard to fit. You’re asking flat fabric to attractively cover a very bumpy section of the body. Jackets have multiple seams and attached sleeves which allow for many more fitting opportunities. One of my favorite resources is Cutter and Tailor.com which offers truly expert advice. It is written for professionals and much of the information is geared to the expert sewer but I thought some of the ironwork techniques weren’t that complicated.
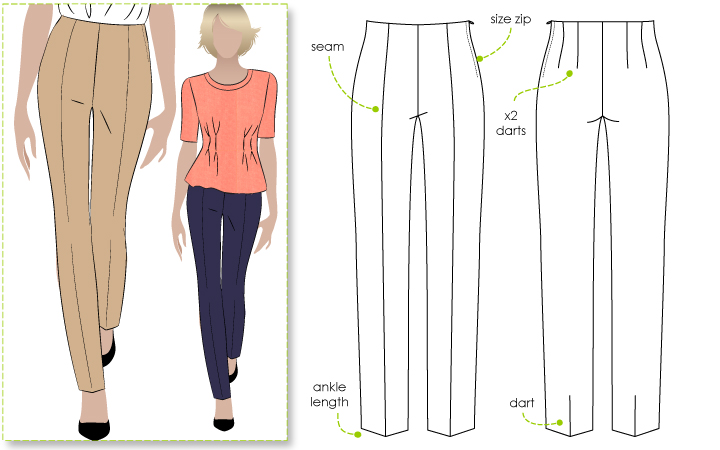
I had made a pair of pants using Style Arc’s Claudia pant. The pant is designed for stretch woven fabric but I used a non-stretch wool and added a little extra to the seams to compensate. I eliminated the seam at center front leg. The pants fit OK but I wanted to see if they could be improved. I had purchased the fabric from B & J’s in NYC and it was not something I was willing to trash. I tend to use better fabrics and am willing to take apart and redo if necessary. Quality materials and natural fibers just behave better and I’m happier with the end result.
Some pattern instructions direct you to stretch the back inner leg seam while joining it to the front and also point out the need to stretch the back crotch seam but the degree of iron shaping necessary for better fit isn’t clear.
There is an extensive article in Cutter and Tailor about shaping the pant sections with the iron and very detailed, clear photos describing exactly how this should be done. Search for “ironwork.” If you Google “pressing” you will get directions on how to press ready-made pants. The author points out:
The correct fit of trousers cannot be achieved by cutting alone, for this must be achieved for the most part through ironwork. Many more errors in trousers have their origins in inadequate ironwork than in the cut. The most important factor in trousers is their width. Different widths demand a different method of working up with the iron, although difference in posture and body habitus also influence this. Even the most perfectly calculated cut could never create well fitting trousers without the proper ironwork.
I eliminated most of the lower leg shaping and concentrated on the hip and seat area. My fabric wasn’t the most pliable but eventually succumbed to stretching, heat and steam. I worked with both back sections placed right sides together at the same time. That way the stretching was equal on both right and left sides.

The pants have a half lining of soft cotton/silk voile and hand under-stitching along the waist facing.


I’m much happier with the fit and will definitely incorporate this technique in future pant construction. My next pair will be from a softer wool which will be easier to shape but even the fit of this tightly woven plaid improved with some extra iron work.


All my resident photographers were unavailable so I resorted to some cell phone mirror shots. The dark fabric doesn’t show too well but it’s pouring rain so no chance of outdoor shots.
While responding to comments I found this info which may be helpful if you are having trouble with basic fitting. Note how many drafts were needed before the pants were even attempted in fabric! Also see how small some changes were and how other fit issues could result from a change.

Thanks so much for your post. I have similar pants fitting issues and the Claudia pant. I will look up this site because pants fitting are a challenge. Lydia
Sent from my iPad
>
I hope you find it helpful. The ironwork isn’t a sub for a well fit toile but it will refine the final pant fit.
Thanks so much for the Cutter and Tailor website! I’m constantly searching for technique websites.
Spend some time exploring Cutter and Tailor. There is so much valuable info.
Great post, Mary! Would love to see your pants in natural light once the rain stops 😉 The fit looks incredible.
Thanks Sarah. I’m working on a top that they will be worn with so I hope to have nicer weather for those photos.
I have learned to love my iron, and this post gives more reason to do so. Although I rarely make pants, now I know where to get fitting help when next I do. Thanks, Mary! Your plaid pants are lovely!
Proper use of the iron can work wonders. Many couture resources emphasize the importance of pressing. I hope you have time and are working on your French jacket that we are all waiting to see.
I have always got a better fit by using European patterns which have a longer back crotch seam than that of Australian or USA patterns. This enables the pants to sit better, and generally give a better fit. My toile is from a Burda with a few personal tweaks. I applaud the use of the iron, as dressmakers we need to iron as much as we sew and I found this article particularly interesting. Thank you
You did not say what problem, if any, you were trying to correct. Are you trying to get a rounder shape to the part of the pants that cover the rounded mound of your seat? From the picture of the two layers of the back of the pants, that seems to be what I am seeing. It is a bit difficult to see on the dark garment, but it does appear to fit well. Wool is so nice to work with in an instance like this. Is there any way to manage this in, say, a cotton poplin?
You are correct that I wanted a better fit through the seat and inner leg. I’m using the same pattern for several other pants and will post pics of lighter colored ones. Wool is easily shaped and I’m also having good results with cotton. Polyester would be more difficult and I’m not sure keep the shaping.
Thanks for this link, it is a fascinating read. I’m looking forward to the clearer photos, it’s so hard to get the right conditions for pictures at the right time isn’t it?
Yes photos can be difficult and it would be nice to have a professional on call. I’m doing more pants using this same pattern so more pice will be coming.
You have inspired me to read Cutter & Taylor again. A few years ago, I spent 40 hours looking for online tailoring resources and I was amazed to find one, C&T. I do appreciate your definition/perspective of fine fit and construction.
Cutter and Tailor is a fabulous resource. I also can spend hours reading through the many topics. Thank you.
Well your pants look beautiful on mary, at least from what I can see. I will check out the website, thanks for the recommendation. Wool pants are not something I have ventured into…something for the future. Are these just dry clean only?
Lighter colored ones are in the works. Yes, these are dry clean only. My next venture will be shaping washable cotton.
I have printed the Cutter and Tailor article and will refer to it (and this post!) for my next pair. You’ve inspired me to tackle a more slim fitting style. The pants foundation I have took 15 years to perfect and is 15 years old. Thank you for all your inspiring work and for sharing it so thoroughly!
Once you have a well fitting pattern it’s definitely worth saving. You can probably modify yours for a slimmer fit. Hope it is successful.
Yes I dread and still haven’t succeeded despite professional help.
I’ve followed your ventures into pants fitting. It may take many drafts but you will get closer on each version.
Sorry that went too early. I’ve read some of these posts previously. I guess it depends a lot on the fabric. Thank you
Yes some fabrics are easier than others. If you get a cotton muslin to look good then a good fabric should shape a little easier. Do use plain light colored muslin for your drafts. Anything patterned will obscure the info you need for tweaking the fit. Keep going!
Those look great!! I temporarily decided to quit on making pants, they just never looked like what I had envisioned… You made me curious about the ironwrok. I came across it several times but never really tried. I’m wondering if the shaping wouldn’t be lost anyway when cleaning them?
Click on the link I have to Cutter and Tailor and if you scroll down and read all the comments after the ironwork illustrations, JeffreyD addresses the issue of maintaining the shape. The pants do need proper pressing but this shouldn’t be too difficult as some of the shaping has been incorporated when joining the seams. Nice to see you back blogging.
Pants with facings just fit better don’t you think? It just makes more sense to make something curved for a curved area. I have seen ironing demonstrated but have never used this technique as I figure that sitting for a long time with a warm butt will “iron” the crotch into a perfect “me” curve eventually…no? Looking forward to you next lighter version! Thank you for the great link!!!!
Since this design extends a little above the waist the facing is definitely better. If I’m making a straight waistband I but it cross grain and curve it before attaching. I find it conforms better to the body than a perfectly straight band. Unfortunately I don’t think that sitting with a warn butt will accomplish the same shaping. The seams are stretched prior to joining; back inseam and crotch seam are stretched more than the front which creates the shaping. Lighter versions are in the works. Thanks.
Thanks for the information in this post. I will definitely be checking Cutter and Tailor – ironwork in particular. It frustrates me when people say they don’t press as they go when sewing as they are depriving themselves of a much better result.
Yes, pressing is just as important as sewing. I can spend hours reading on Cutter and Tailor. Have fun.
Fascinating! And perfectly timed as I’m planning on sewing some woven pants shortly. I’m off to research!
Loads of info on Cutter and Tailor. I picked up some useful tips.
Thank you for the source material. That explains a few things about why pants fit awkwardly even after lots of adjustments to seams. Great post.
Glad you liked this and I hope you found the info useful.
When I use your link for the ironwork article, there are no pics. When I went to the website it seemed this was for members only and I wouldn’t qualify. Any advice on how to access this article. I have been trying to make pants for years with unsatisfactory results but I keep plugging away…my closest yet was drafting my own with a Threads article but still not great. I wouldn’t even say I have a difficult body. I am tall and pretty slim with a long crotch length. Very short waisted. Thanks for any help. Lynne
I tried to access the article on Cutter and Tailor but apparently their website needs updating to be able to access the photos via Photobucket. I’m a member there so it has nothing to do with being a member of Cutter and Tailor or my blog. I’m going to try and find another reference or a way to access the info and will get back to you. Since the photos were published on their site I didn’t want to copy the info but redirected my readers to the Cutter and Tailor site. Thanks for letting me know.
The pants look gorgeous on you. Fabulous fit!
I do some pressing when sewing but I never thought it was this important! Thank you! Lovely work!
Pressing is truly crucial to great results. Thank you.