couture sewing, creating designer trim, Drafting Patterns, French Jackets

Cropped French Jacket with Matching Sheath Dress

The creation of this ensemble required much more problem solving than might appear. The fabric is a lovely designer boucle from Mendel Goldberg Fabrics and the contrast color stripes, both vertical and horizontal, presented a challenge in matching.

I constructed the sheath dress first. The darker navy stripe looked too dominate when placed on the center front. A better placement was to have the more muted blue stripe at center front. Placing the same at center back resulted in two dark navy lines next to each other along the side seam which didn’t look so wonderful. The solution was to move the center back just slightly and also shift the side seam towards the back.

The jacket was to be just below the waist with 3/4 length sleeves. My goal was to have the dominant stripes line up when the jacket and dress were worn together. A classic French jacket design has princess seams ending at the shoulder. While cutting the fabric as per the pattern fit my client’s custom padded mannequin, the extreme mismatch of the fabric design wasn’t so great.

My customary way of dealing with this is to shift the princess line closer to the neck and use steam to manipulate the fabric into shape. Anyone who has taken a French jacket class with me has experimented with this technique. Unfortunately, the fabric just wouldn’t cooperate. This boucle was mostly cotton, which doesn’t yield as easily as wool, to heat and steam. I might have been able to get away with putting in a dart, but the converging lines on the upper chest didn’t look great.

What worked best was to rotate the princess seam into a horizontal bust dart. I created a new princess seam which was shifted closer to the side seam and away from the bust point. Waist shaping was incorporated into the seam. Cut along the new seam line. The part of the dart closest to the side seam can be joined while the remainder of the dart forms what’s known as a Dior dart. Apply the same alteration to the back pattern by relocating the princess seam to start in the armseye. Waist shaping gets moved to the new seam lines.

Finished result of all this careful pattern work and attention to stripe placement. Vertical lines on both the dress and jacket match!! I was careful to place the horizontal pink stripes away from the fullest part of the bust. The Dior dart was also placed midway between two pink horizontal stripes so not not to appear awkward when sewn. Keeping the spacing between pink stripes consistent between the dress and jacket also needed to be taken into consideration. It probably looks effortless but if you’ve ever matched plaids, know otherwise.

The lining is a Pucci print chiffon underlined with pink silk crepe de chine. Yes, the lining was underlined. The chiffon print was such a perfect compliment to the boucle it had to be used but too transparent to hide the inner construction. Interestingly white underlining didn’t make the chiffon as opaque as a light pink.

Finishing details were handworked buttonholes with the reverse side of buttonholes finished with very narrow faux bound buttonholes. I used a variety of coordinating yarns plus a few fibers pulled from the boucle yardage as trim.

So much thought went into the creation of this and my client is thrilled with the result. Thanks for reading.

Cloning Designer Garments, couture sewing, creating designer trim

New Class Schedule is Live

Registration is open for my upcoming in-person classes. I’ll be hosting a sewing retreat in Bristol, RI October 2-8, 2023. Immerse yourself for 7 days of couture level sewing in the charming town of Bristol. Class fee includes 7 days of instruction plus accommodations at an Air B&B, snacks plus a group dinner at one of the lovely historical restaurants.

The November class in Palm Beach Gardens, FL is geared towards creating a custom French Jacket. You’ll construct a muslin test jacket prior to class (instructions provided). After perfecting the fit, you will be guided through the steps to create your own version of this iconic jacket. Read the class description for additional information.

The January 8-14, 2024 class is an opportunity to work on, or complete, your French jacket, construct a custom dressform or another project of your choosing. I will contact you prior to class to discuss your plans. Some students begin a new project while others bring partially completed ones for expert assistance in completing the garment.

This class is a great time to create a dressform which replicates your body. You will also draft a master sloper which serves as the basis for altering patterns or creating your own. Completed forms fly easily in a golf bag as checked luggage.

I am also offering a 1 or 2 day class this spring, May 20-21 at Mendel Goldberg Fabrics in NYC. The class will be geared towards creating custom trims to coordinate with Alice’s exquisite boucle fabrics. She will clear the shop for us to work Saturday and Sunday. This is a hands-on workshop where I’ll guide you through how I choose yarns and design a trim to match the fabrics. Techniques used are crochet, braiding, braiding on a Japanese Kumihimo stand and more. I will also explain my method for handworked buttonholes in boucle fabric and the specialized notions which give a professional result. Different topics are covered each day; Saturday and Sunday are NOT repeats, so attend both days for the best experience. You will enjoy this class more if you are comfortable with basic crochet stitches.

Class registration can be accessed through the “Classes” drop down menu or “Shop” and then look at the Catalog. Hope to see you. Any questions, email me at MF953@aol.com or leave a comment. Thanks for reading.

couture sewing, Drafting Patterns, Dress Forms

Custom Dress Forms

In my recent moulage/dressform class, students used everything from a custom made full body form from Wolf to a display form found at Hobby Lobby. Evidence that you can get almost anything that resembles a body to work.

We ripped the existing base off the display form and replaced it with a wooden dowel. The dowel fit into a sturdy cast iron base and was a huge improvement over the rickety wooden one. Class begins with taking about 25 body measurements. We then draft a moulage, or mold, of the body. The drafted moulage pattern is cut from sturdy muslin and tested on the body. Fit adjustments are made and transferred back to the paper pattern. When all looks good, we cut the final dressform cover from heavier muslin and do one last fit check.

The muslin cover is draped onto the form. Placement and amount of padding is assessed and we start padding the form to fill out the cover. Depending on where padding is needed, I’ll suggest using various bust cups, cotton quilt batting or polyester batting. The poly batting is steamed to compress and firm up the shape. The display form fit her neck and shoulders surprisingly well. Bust, waist and hips can all be customized with layers of compressed batting.

At the opposite end of the dressform spectrum is a custom made full body form from Wolf. This student had wrestled with fitting problems for years and tried everything from body scan versions to this custom model but nothing seemed to address a key fit issue.

She had already drafted a custom cover to fine tune the fit. It needed firmer padding and a key adjustment for a high hip. After drafting the moulage it was test fit and elastic tied around the waist to pinpoint the fit issue. The right hip significantly higher causing skirts and pants to ride up on the right side. Notice the position of the waist when her back draft is laid out on a grid. Lowering the hem on that side really doesn’t fix the problem.

We carefully marked the dressform cover and added padding to duplicate the hip contours. The finished form is a much better fitting aid with balance lines correctly placed.

We tested the fit using several of her dresses. The new mannequin pinpointed the need for a slight full bust alteration to remove the drag lines around the bust dart. The moulage patter is used to create a custom sloper or basic pattern which can be used as the basis for drafting additional styles and correcting commercial patterns.

The next custom moulage/custom dressform class will be held January 10, 11 and 12 in Palm Beach Gardens, FL. For more information: Dressform Class

circular ruffles, Cloning Designer Garments, couture sewing, Drafting Patterns, Draping

Drafting Circular Flounces

My style tends towards sleek, tailored clothing but this blouse with its many circular flounces was one I had to try.  The inspiration is from Alexander McQueen’s RTW line and retailed for over $1000.  Wonderful look for summer that I could definitely do for less.

McQueen White Ruffled Top 1 McQueen White Ruffled Top 2

I draped a slim fitting princess line top using my body double dress form. It extends to the high hip line here so I can play with the placement of the hem flounce.

Blouse Drape

An interesting technical point is that these are known as flounces, not circular ruffles. In the garment industry, a ruffle by definition has the excess fullness gathered into a seam while the fullness of a flounce comes from the curved flare of the fabric.

The flounce pattern is created by drawing concentric circles. The inner circle is attached to the garment.
circles

Drafting the flounce does require some basic math and decisions about how full you want the flounce. The left diagram shows a flounce with an inner circle of 1 inch diameter and one inch wide flounce. The circumference of the inner circle is 3.14 inches which will be the length of the seam joining to the garment. The outer edge of the flounce will be 9.42 inches. Fullness is calculated as 9.42 divided by 3.14 equals 3 or 3:1 ratio.  However, imagine that you need a 6 inch long flounce. Drawing a 2 inch diameter circle surrounded by a 4 inch diameter circle creates a flounce 6.28 inches long with an outer edge 12.56 inches long. Note that the fullness has changed from 3:1 to 2:1 (12.56 divided by 6.28).  If the desired fullness is 3:1, then the flounce will need to be cut using two of the smaller circles and seaming them together.

lower flounce

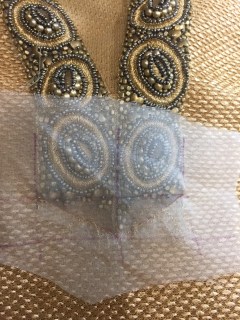
I’ve drafted a 3 inch deep flounce for the lower edge of the blouse, cut a test from muslin and attached to the toile.  To achieve 3:1 fullness, I’ll use four sections (two back and two front).

Drafting the flounces for the neckline and center front required more complicated methods.  Flounces behave differently depending upon the seam they are attached to.  Vertical hanging flounces cascade down in folds.  The fullness of a flounce is increased when attached to a inside curve and decreased when attached to an outside curve.  The Art of Manipulating Fabric by Colette Wolff is a wonderful resource which more fully explains these concepts.

The neckline is an outside curve. Therefore to maintain the same appearance of fullness, the flounce at the neck was drafted with 4:1 inner to outer ratio.  The math can get complicated, especially when you need to consider the length of flounce needed, width AND fullness ratio desired plus adding seam allowances.  Then compound all this with varying width flounces for the center front and armholes.  I’ve devised a relatively simple way to draft all this.

Either buy a tablet of graph paper or print some out. There are free internet sources for printing all sizes of graph paper. I like Math-Drills.com .  Search for graph paper and print out a few sheets of 1/4 inch size. Metric users try 0.5 cm; I found the 1 cm. size just a bit too large to produce smooth curves using my method.

math drillsBack neck pattern

Measure the length of the seam the flounce will be attached to. Measure the SEAM LINE, not the cut edge. All drafting is done referencing the seam line; seam allowances are added afterwards. I’ll show the back neck: seam line from CB to shoulder seam is 3.5 inches. 4:1 fullness is desired and 1.75 wide flounce so I’ll cut and tape together a strip of graph paper 1.75 inches  by 14 inches (3.5 times 4).

Cut along every fourth line leaving a tiny bit attached at one long edge. If you cut through, it’s no problem to just tape it together. Overlap the sections so there are four blocks at one edge and one block at the other edge.

Cut graph paperline up overlaps

The inside edge won’t line up perfectly but I just eyeball it. You can also draw in a line to help. Tape the sections in place as you go. This is what the pattern will look like. It’s very clear that there is a 4:1 ratio of inner to outer length. Also it isn’t a complete circle which is good as there is space to add seam allowances.

completed overlap

The pattern can be cleaned up by using it as a gauge to draw circles with a compass. Use the end points on the outer circle and connect to the center for symmetrical seam lines. I find this much, much easier than trying to mathematically calculate the dimensions of the inner circle, outer circle, width of flounce, maintain fullness ratio. With all these variables, I wound up with a partial circle and calculating the percentage needed of such circles produces some dizzying math.

cleaned up draft

The graph paper method greatly simplifies creating the long cascading flounce along the center front.  If you draft a flounce and trim off the outer edge to create a flounce narrower at one end, the proportion of fullness changes.

spiral draft

Here is a flounce which gets narrower at one end.  I trimmed off the outer edge of a 3:1 circle. If you count the squares, it goes from a 3:1 fullness to a 2:1 fullness. This may be what you want, but what if you want to maintain the same fullness the entire length?

Here’s how I created the center front flounce. Measure from center front to the desired length.  After some experimentation, I decided 3:1 was a good fullness. Create a strip of graph paper 3 times the finished length by the wider width. Draw a sloping line from wide point to narrow point.

sloped graph paper

Trim off the paper above the sloped line. Cut along every third square and overlap to create a curved pattern.

overlaped spiral

The pattern will spiral over itself.  Keep going and let it overlap. It will be divided into sections later.

completed flounce

My front flounce needed to be divided into two sections to avoid the pieces overlapping.  Deciding where to place the cuts is a trial and error process. You want a few seams as possible and the seams need to be placed where they are inconspicuous.

It may take several muslin trials to get seams where you want them.  Trace off your master pattern so it is intact in case your first seams aren’t where you want them. Since the diameter of the circle is constantly changing along the length of the flounce the circles will turn into ellipses.  Here is the lower section of my front flounce. I’ve left room for tiny seam allowances to join to the upper flounce section.

maintain ratio

My pattern traced off to pattern paper.  Label everything as the pieces will get VERY confusing. I also keep my graph paper models intact just in case I need them.

Pattern

The armseye flounce is drafted in the same way. I did experiment with a 5:1 fullness but felt it too much and ultimately went back to the 3:1 proportion. Some experimentation is necessary as every flounce will behave differently depending on its width and placement.  The fullness is removed under the arm at the side seam.

5 to one draft underarm

completed toile

Since this design is symmetrical, the toile is only of the right side. I’ve also hemmed the center front flounce as the drape of flounces does change with the edge finish used. Drape flounces in a fabric similar to the fashion fabric as a silk chiffon will behave much differently than a crisp cotton. I will use a woven textured white cotton that looks almost the same on both sides as the wrong side of the fabric will show on this. Blouse is in production for the next post.

Dress Forms

Make a Custom Flexible Dressform Arm

Before I start on the instructions to create a custom arm for your personal sized dress-form a quick update on Wolf Dress-forms. Sadly the company is out of business and Peter Lappin of Male Pattern Boldness tells the story. Wolf forms occasionally show up at tag sales, store closings, on EBay or Craig’s List but they can command a hefty price. If you are lucky they can be purchased for around $200. Best of luck if you embark on a search.

I’m always looking for snippets of information as to the workings of couture ateliers. The film, Signe Chanel, shows an inside view of Chanel’s workrooms and I noticed that the mannequin arm is extremely soft and flexible. Not at all like the rigid arm form which came with one of my forms.

Pre Made ArmPre Made Attachment

This arm is very heavy and intended to be attached by tying the tapes around the neck. Unfortunately this never worked well and was difficult to insert into the garment sleeve. I’m including my pattern for a custom sleeve form as a printable pdf document. Hopefully I’ve formatted it correctly. This is my first attempt using Adobe Illustrator and have found the learning curve fairly steep. The pattern tiles are 7.5 x 10 inches so expect 1/2 inch margins all around if you are using US paper. It should also print out on A4 paper fine, just adjust the margins. Print out page 1 to check that the size box prints at 4″ x 4.”

PDF Layout

Mannequin Sleeve

There are NO SEAM ALLOWANCES. I used cotton drill cloth for the two main arm pieces, cotton muslin for the oval armhole and wrist covers and cardboard to insert into the armhole/wrist covers.

Fabricsitch lines

I’ve traced the stitch lines in blue dashed lines and am adding 3/8 inch seam allowances. Transfer the vertical and horizontal balance lines also. I use washable marker. Notice the vertical line down the upper arm pivots at the elbow.

There is ease on the upper arm at the elbow point. If you try and match up the stitching lines there is excess fabric which needs to be eased in to create the elbow shape. Stitch the back seam first.

Elbow EaseElbowElbow 2Completed Seam

If your balance lines are slightly askew at the elbow, blend into a smooth line across the seam. The marks will dissolve with water after you topstitch the line. Press the seam open. I use a topstitching (has a larger eye) needle and two strands of black thread to trace the balance lines using a 3.5mm stitch length. There are three horizontal balance lines, one at the elbow, one at the underarm and another about 2 inches up from the underarm. Extend the upper balance line to cross both sleeve sections.

Elbow with corrected lineCompleted Seam

Close the remaining seam matching the stitched balance lines. Press open. Close the dart at the top of the sleeve. Cut the shoulder piece (looks like a shoulder pad) from drill cloth. It needs a seam on one side only. I serge the outer edge to prevent fraying. Using a 4.5m stitch, sew along the top of the sleeve. It will gather up slightly which is all you need. Don’t try and ease it like a set-in sleeve.

Top DartAdd SeamsCap Ease

Clip within the seam allowance on the shoulder section. Mark the mid point and attach it to the arm, matching the mid point to the dart on the sleeve. Make sure you have right sides facing each other. It should look like this.

Completed shoulderCompleted shoulder right side

To stuff the sleeve I use soft polyester fleece. I cut a piece the length of the sleeve plus about 2 inches. Roll up the fleece, not too tightly, and gauge about how much is required to fill out you sleeve. I want the sleeve to be full but not tightly packed and stiff. The wrist and lower arm needs less fill than the upper arm so I shape the fleece like this. I’ve used about 30 inches an have cut off one corner so that the lower arm has less stuffing than the upper.

Cut Fleece

Begin rolling at the shorter end forming a soft cylinder which is fatter at one end. I safety pin a length of ribbon onto the slimmer (wrist) end, insert the ribbon through the top and pull it through. If you want more or less fill pull out the roll and adjust the amount of stuffing.

Rolling fleecePull through

Trim the fill at the armseye end leaving enough to fill out the top.

Fleece at top

Cut ovals from cardboard for the wrist and armseye covers. I use lighter weight muslin (the drill cloth is too stiff to gather) and add about 3/4 inch seam allowances. Stitch around the edges, insert the cardboard and pull the threads up to create the covers.

Cardboards

I place the armseye cover against my form and mark the shoulder seam point. Notice that I’ve angled it towards the front to better replicate my arm position. Human arms tend to fall slightly in front of center. Line up the wrist oval to simulate the wrist shape. Again wrists aren’t circular; they are wider when viewed from the top of the hand than the side.

Scye cover rotatedAttach Wrist

Hand sew the covers in place with a whip stitch. Your new arm can be attached with a few pins (I use flat head pins and push them at an angle to avoid snagging the garment). This pattern is for the right arm. If you would like two arms just flip the pieces and make a matching form for the left side. See how easily her arm bends and I’ve found this version much more workable than the premade ones.

CompletedBendable Arm

This will make a fairly slim arm. If your arms are larger and you want to adjust the pattern I would suggest this method. Trace the pattern onto your preferred paper and slash the upper and lower arm sections. I don’t cut up my master pattern until I’m happy with the changes. If the first alteration doesn’t work I haven’t destroyed the original and it’s much easier to start over.

Adjust

Divide the amount you want to adjust by 4 and spread the pattern sections by that amount. It doesn’t need to be the same for the entire length of the pattern. You might want an extra inch at the wrist and an extra 2 inches at the bicep. Overlap the sections if you need a smaller arm. Likewise the length, both above and below the elbow can be adjusted. The ovals for the armseye and wrist covers will need to be adjusted and I would just use trial and error. There is a mathematical formula for figuring out the circumference, long and short axis of an ellipse but you don’t want to see it. Anyone with a math background will understand! Enjoy.

Dress Forms

The Custom Dress-form

Many sewers dream of owning a dress-form that duplicates their body. Anyone who sews knows how tough it can be to fit yourself. Imagine the luxury of being able to put your semi-completed garment on your body and step away to evaluate the look and fit.

I posted details of my method to create a custom form in 2014. Fitting For Couture in April and Dressforms Continued in May.

I’ve tweaked the form a few times since then (extended the hipline lower) but the method remains the same. My reference lines (bust, waist, high and low hip, center front and back seams) are marked by machine stitching with two strands of black thread before attaching the cover. The style tape in this photo is for the gown I was draping.
style-lines-2
This gown was draped and fitted on my custom form and required very little final adjusting.

20170115_212318

My key to knowing where and how much to pad the form is guided by a custom drafted moulage (Suzy Furrer’s Craftsy Class walks you through the drafting) which is sewn in lightweight canvas and forms the new dress-form cover. Several readers have asked about using one of the fitting patterns by Butterick/Vogue, etc. or even a princess line dress pattern.

Butterick patterns were on sale so I made bodices from B5627, the fitting pattern. I measure for a size 12 but normally cut an 8 when using one of the big 4 patterns. The results:

fitting-1

Size 12 on the left, size 6 on the right. I adjusted the bust for a C cup on both samples.

The size 6 fits my form pretty well but the 12 is ENORMOUS! Who allows this much ease in a fitting shell? Another view showing how much extra room.

fitting-2

Experienced sewers know to downsize but if you blindly follow the measurement charts the result will be a very over-sized garment and multiple fitting adjustments. If you want to skip pattern drafting at least choose the size based on your high bust measure (that’s the one taken high up under the arms) and EXHALE when measuring.

The size 6 still needs minor adjusting but wouldn’t be impossible to work with. I’ve narrowed the back, added to the front and taken a dart to conform to the chest hollow. The bust point needs lowering by an inch. I would also raise the underarm in front if using this for a form cover.

fitting-4fittting-3

The process is messy but worth it. Un-bonded cotton batting makes it easy to feather out edges and it also compresses well. Rochford Supply sells this by the roll; too much for one form but maybe split among your sewing buddies. Don’t use light weight muslin for the cover. It needs to be sturdy and drill cloth works wonderfully.

padding

Have fun with this. It’s not a project to finish in a day but once completed you will not regret the time spent. Next post I’ll show how I construct a pair of flexible arms.  Questions, problems or suggestions: please comment.

My suggestions for specific forms:

Wolf: The top of the line. Very well made by hand from paper mache. Heavy base and cage very smooth and well finished. Mechanism sturdy and constructed to last more than a lifetime. I have one of these (found on Craig’s List for $200). The cover was almost gone but inner structure functioned perfectly and with a new cover she looks wonderful. New Wolf forms are $800 and up depending on options.

Superior, Royal, Milano: Very well made with sturdy mechanisms and heavy cast iron bases. The cages are well finished and no rough edges to snag fabrics. Very close to the quality of Wolf. I found a Milano form at a going out of business bridal shop. These brands sell new for $650 to $750.

PGM, The Shop Company: Fiberglass forms covered with a layer of foam and canvas. These are probably the most cost effective if you are buying a new form. PGM forms cost more ($299 to $229) than those from The Shop Company ($195 to $219). The skirt cage on the PGM form has more supporting wires than The Shop Company version. I’ve worked with these forms and the wire cages have rough edges which are a snag risk for fabrics although this is easily overcome by covering the cage with canvas. I haven’t used either brand long enough to attest to the longevity of the shoulder/height mechanisms. If you are looking for the least expensive option this is probably the way to go. You will probably be adding padding and your own canvas cover so the fiberglass and foam covering won’t be a factor.

Adjustable Forms: Don’t waste your money. Flimsy bases and they tend to tip over. The body proportions are STRANGE. I once took a hacksaw to the shoulders of one because they were so badly shaped.  They aren’t that much less than the much sturdier version by The Shop Company. I’ve also worked with these and the gaps created by changing sizes and the adjustable dials bothered me less than the lightweight base. Fitting entails a fair amount of tugging and pulling on the garment and it’s extremely frustrating to have your creation on the floor because the form constantly tipped over.

Duct Tape Forms: Wrap yourself in duct tape or plaster casting tape. There are tons of videos demonstrating this process. Some have had luck but most have ended up trashing the final product. I think the toughest part of this approach is constructing a solid stand. I actually tried this once just to see how it would work. For the time, effort and money for materials I would opt for one of the lower cost professional models with cast iron base.


Cloning Designer Garments

Do You Have $7000 to Spare?

I often take inspiration from a designer outfit and this one from Alexander McQueen caught my eye. The sweater retailed for $5000 and the skirt another $2000. Why not try to replicate the pieces?

mcqueenblacksweaterandskirt

I fashioned the skirt from a tweed from Linton Mills and added contrast black leather from Mood Fabrics. Concerned that the leather might rip at the top of the slit, I reinforced it with grosgrain ribbon. Notice the ribbon peaking out from the lining. The most difficult task for the skirt was topstitching the leather. My industrial Juki with an edge compensating foot attached made the job easy and produced perfectly even stitching. I sewed over tissue paper just to make sure there were no problems with the fabric feeding evenly.

top-stitch-leatherskirt-reinforcement

Finished skirt:

finished-skirt

For the sweater I used a purchased (on sale of course) one and added the rhinestone embellishment. Rather than apply heat set Swarovski stones directly to the sweater I opted to design each element separately and hand stitch them on.

I designed the motifs on sticky backed transfer film. The rhinestones are placed wrong side up and them heat set with an iron. I used one layer of cotton tulle covered with another layer of silk tulle.

rhinestone-placementembellishment-done

The silk tulle edge gathered, turned over a cardboard circle, and pressed flat.

gathering-tulleready-to-attach

My sweater blocking board was perfect to stretch the sweater slightly and figure out the placement for each motif. Some motifs were composed of sewn on larger stones and pins helped with placement of each stone. The safety pin marks the bust point so I don’t place a motif directly there.

sweater-boardplacement-for-sewing

The large black flower surrounded by tiny stones was the most difficult. I used a scrap of black Ultrasuede, digitized the design, and sewed in the embroidery hoop. Tiny 2mm rhinestones outlined the petals.

hoop-design-2

sweater-and-skirt

completed

My little girl Sydney decided she wanted to get into the photo. I’m on my way to a party for my husband’s parents 70th wedding anniversary! How many couples make 70 years together? Quite an achievement and the entire family gathered to celebrate with them. For all those who asked for more details,  I promise the custom dress form is coming next.

Evening Wear

A Black Tie Wedding: What to Wear

My last post detailed my pool party tunic for the wedding our family attended in Miami earlier this month. The wedding was black tie and of course I created a special dress (when friends and family know you sew, you can’t exactly show up at these affairs in a store bought garment).

Here is the inspiration design and spectacular fabric from B&J’s. I spotted this while shopping in the NYC garment district and knew this would be the fabric to work with.

inspiration

The black silk taffeta from Como, Italy is a border design composed of hand painted flowers and dimensional black flowers in what felt like vinyl paint. A closeup look shows the brush strokes. This design was definitely done by hand; there is somewhat of a repeat but there are irregularities characteristic of hand work.

flower-closeup

Now that I have the fabric, what to do with it? Sometimes the characteristics of fabric dictate the design. I wanted a slim fitting style with fullness at the hem. I did a toile using released box pleats, but it just wasn’t right.

box-pleating

Flaring the skirt using a border print poses problems. The hemline has a distinct curve which causes he border to appear off grain. Layout showing a conventional pattern shaping:

layout-1

The hem curve may not look pronounced in this scaled down illustration but it became quite noticeable when enlarged to full scale. Solution: break up the fullness into multiple smaller sections which allowed the hem to follow the horizontal line of the border. I had three yards of fabric and planned for the hem fullness to be distributed as 1 yard in the front and 2 yards in the back. Lower bodice sections fit nicely in between the skirt sections.

layout-2

My custom dress form also needed a little tweaking as this design would follow the back hip area closely. Most dress forms stop at the hip line but I wanted mine to extend down past the low hip. I constructed a new cover and also added two flexible arms. Details of how to modify a dress form in this way will come in a future post.

refined-dress-formdress-form-arm

The dress was designed using a combination of draping and flat pattern design. I applied style lines to the form to drape the bust and hip areas. The side seam was shifted towards the back; I felt the back seam lines worked better this way. The front had a single princess line; hem flare started 9 inches below the low hip and flared to 36 inches in the front, 12 inches in each of the 6 back sections for a total hem width of 108 inches.

style-lines-1style-lines-2

The silk taffeta was underlined with silk organza. A layer of black cotton muslin provided additional support and extended from the waist to 9 inches below the low hip line. It was catch-stitched just inside the seam lines. The interior corset was cut from two layers of cotton tulle, one layer on the cross grain and one on the lengthwise grain (a technique I picked up from studying the work of Barbara Matera, the renowned Broadway costume designer). Spiral steel boning is enclosed within the casings. I find the tape used to stabilize armholes in tailoring makes a wonderful thin and strong way to prevent the top edge from stretching out of shape. The white zip is basted in for fitting but will be removed when the corset is sewn into the final dress.

interior-corset

I felt a lining in the hip area would be prone to shifting and might cause wrinkles, so I opted to finish the seams in this area with lengths of grosgrain ribbon. The white boning which extends from the top to low hip is one length of horsehair braid stretched, steamed and zig-zig stitched into another length of un-stretched horsehair braid. I find this boning is flexible yet smooths the seams over the body in a slim fitting garment.

interior-boninginterior-hip

I found a wonderful  embroidered tulle with three dimensional flowers to form the upper bodice and sleeves. An underlayer of cotton tulle was fitted and thread traced for use as a pattern when cutting the heavily embroidered tulle. Having each section with seam lines thread traced made it much easier to place the design so it would be mirror-imaged from right to left sides.

final-tulle-fittulle-used-as-pattern

A section of the embroidered edge was shaped to follow the collar. The decorative edge fell stitched in place and excess cotton tulle trimmed away.

collar-detailcollar-completed

I don’t care for the look of just sewing a plain seam when an appliqued seam could make the transition from one fabric to another look better. I sewed the back upper bodice through the layer of cotton tulle only; then hand appliqued the decorative tulle edge.


The front seam got a few appliques to disguise the seam. Working with lace is so forgiving as you can hide almost anything. Here is a shoulder seam before and after a little applique work. I also find it easier to work in sections and complete as much as possible before joining one section to another. Finish the skirt, inner corset, lace section and bodice before attaching them together. It saves much wear and tear on the dress.

shoulder-seam-1shoulder-seam-2

front-view

side-view

back-view-skirt

Another small detail gleaned from Barbara Matera: raising your arms in a close-fitting dress can be difficult. Solution: add an underarm gusset. I cut a football-shaped piece of stretch mesh (about 5.5 inches long by 3 inches wide) and inserted it in the underarm seam centered between the front and back. Sewing by hand was much easier than manipulating the dress into the machine. It doesn’t show and makes moving so much easier.

underarm

Have you ever had a major clothing malfunction? For the back closure  I found a zip with sheer mesh tape while shopping in NYC. It was only available as a two-way zip. I figured no problem, I would just insert as usual and not use it as a two way. Put my dress on; all’s fine. We are leaving for the ceremony and my daughter-in-law notices the zipper is starting to open in the middle of my back. Within minutes the entire back is open. I tried to run the slider to the bottom and realign the coils but no go. My husband asks if I have anything else to wear. This is an out of town affair and I didn’t exactly bring a selection of evening gowns. There is only on solution: get sewn into the dress. Fortunately my husband is an OB/GYN and has a fair amount of experience sewing (humans that is). I did have a supply of needles and thread so, with Holly holding a cell phone light on the sewing (operative) field, I told him to just whipstitch (non-interrupted running stitch), the zipper tapes (incision) closed. I had a backup supply of needle and thread in my evening bag just in case but his stitching held firm throughout the night. I’m replacing the zip with my standard invisible version which has never once failed.

20170115_212318

couture sewing

Another Wedding and a New Tunic

Our family is in wedding mode.  We gathered in Miami this past weekend to celebrate our nephew’s marriage. I also finally got to meet Sarah of Goodbye Valentino in person! We have been following each other’s blogs for several years and I was invited to do a guest post for the launch of “The Tunic Bible.”  I wore an ankle length tunic to the welcome party around the hotel pool; very appropriate attire.

with-sarah

The tunic fabric was purchased in Mood several years ago. It is like raffia but much softer and woven with a knit backing. The fabric is quite flexible and extremely comfortable. I used my master tunic pattern and was able to eliminate the back waist darts and incorporate the shaping into the side seams.

I enjoy having my garments look clean and finished on the inside. All seams were bound with narrow strips of bias cut china silk. I attached them with hand sewing; much more elegant and softer than machine stitching.

inside-armholeinsid-front-facing

The side vents and hem were invisibly slipstitched, catching only the knit backing, to prevent them from flipping to the right side. The collar band was faced with a scrap of gold toned silk charmeuse.

inside-heminside-shoulder

The challenging aspect of this project was to work the trim (also purchased at Mood Fabrics) so it looked custom shaped for the neckline. The neckband trim was arranged so that the motifs were symmetrical at center front and front neck opening pieces were mirror images.

tunic-trim-1

Removing the unwanted beads and stitching was tedious to say the least as I didn’t want to damage the net backing. It would be needed to back the bald areas and prevent beads from sinking into the textured fabric. Save the removed beads for later.

tunic-trim-2

To create a neat finish at the lower edge I stitched silk organza in the desire shape to face the edge. Hand stitches here; machine stitching this would have been impossible to control. Turn and trim the organza.

tunic-trim-3tunic-trim-4

tunic-trim-5

Fill in the areas with saved beads and it looks like a custom shaped trim.

Next up will be the gown I created for this black tie wedding. Sarah just published pics of her stunning outfit; be sure to take a look.

Wedding Gowns

The Wedding Gown: Inside Details

My youngest son was recently married and I had the joy of creating my new daughter-in-law’s gown. But before elaborating on the details of her gown I thought I would share photos of gowns I created for my other two daughter-in-law’s.

My oldest and his bride opted for a beach wedding on a far flung island in the Bahamas; not easy in terms of travel and logistics, but spectacular. She chose heavy silk crepe fabric and I embroidered abstract roses on the skirt. Random petals were cut out and backed with silk organza. The embroidery doesn’t show well in the photo. Silk organza flowers covered the narrow shoulder strap and cascaded down the bodice.

liz-gown

My middle son’s bride chose an antique looking crochet lace woven from silk, wool and cashmere. The ivory lace was backed with white silk charmeuse and underlined with ivory silk tulle. The lace required precise layouts as it had a large pattern and I wanted to position the scalloped edge to skim the ground in the front. Hemming this lace wasn’t an option so the toile needed to be carefully fitted. I also played with various edge and seam finishes using the lace borders. Here is a pic of her getting unrumpled and set for her entrance.

sarah-gown

My youngest and his bride chose a beach setting for their wedding so her choice of a simple gown sewn in heavy silk crepe worked well. We designed a dress with a fitted and flared skirt, bodice with low necklines front and back, and jeweled belt.

The problem with low neckline in both front back is keeping the shoulder strap up. The bride doesn’t want to spend the night struggling with falling straps. Spiral steel boning solved the problem. After attaching the strap to the back bodice, interfacing with a channel for the boning was stitched to the underlining. The boning extends to the waistline seam in order for the strap to be supported from the waist up.  Seams were turned under and catch stitched, ready for lining.

back-boningback-strap

My first draft of the bodice had all the shaping transferred to one dart but no matter how I shaped and pressed the dart it ended in an unattractive point. The day before our final fitting I removed the front bodice and remade it using princess seaming which had a much better silhouette. I added a layer of cotton flannel to the front to camouflage a stick-on bra. The flannel was catch stitched just inside the stitching lines to avoid unnecessary bulk.

bodice-first-draftbodice-second

Firm cotton sateen reinforced the center front. I normally use silk organza for this but the deep plunge neckline needed something firmer.

front-stabilizer

The lining was inserted by hand. There was no way to do this by machine and sometimes sewing by hand is simply easier and produces better results. Hand sewing enabled me to ease the lining in much smoother than could have been done by machine.

lining-1lining-2

A final touch for good luck is a horseshoe covered in silk ribbon. I start with a small cardboard horseshoe shape. Wrap narrow silk ribbon from both ends meeting at the top. Secure with narrow double sided tape and add a bow.

hs1hs1

hs3hs4

A French bustle held the skirt up for the reception. Color coded silk ribbons made it easy to tie everything up after the ceremony.

bustle-diagram

The bow drooped but all else stayed secure.

bustle-back

veil-in-wind

preview