Drafting Patterns, Dress Forms

Dress Forms Continued

After my last post I acquired a couple more dress forms and decided to do two things. First was to use Suzy Furrer’s method of drafting a moulage for different shapes.  Second was to try using those moulages on non-professional forms and post a review. Although a professional form is a very nice addition to your sewing tools, it can be pricey and you may have an older form and not have the space or funds for another.

The good thing is that this is a one-time purchase. You need to select a dress form based on your bone structure, NOT  your bust measurement.  I have found the most accurate way to do this is to compare your cross-front  width to the form. PGM publishes this on their website: pgmdressform.com.  If buying a form from  EBay or Craig’s list, ask the seller to give you this dimension. Also check the shoulder length and cross back width. Your form should fit you at the shoulders and neck. Anything else can be padded. If you start with form that’s too big in the shoulders, you’ll never be able to get an accurate  fit. Compare your shoulder, cross front and cross back measurements with any form you are considering.  Get as close as you can with these three dimensions and fix the rest with padding. The padding can always be redone if you lose or gain significant amounts of weight, but your bone structure won’t change. The most common mistake seems to be getting too large a form.

There are many companies who make professional dress forms and I’ll list some of them here.

Wolf has always been the gold standard of dress forms. They are made by hand and last more than a lifetime.  They are also the most expensive.  Pricing depends on the options you select and Wolf forms can be over $1000.  Occasionally one shows up on EBay or Craig’s list  but they usually aren’t any bargain.

PGM sells online at pgmdressform.com. They offer three options: collapsible shoulder and shaped hip for $399,  collapsible shoulder with flat hip for $299,  non-collapsible shoulder and flat hip for $199.  You can always create your own hip shaping with pads but the shaping is nice to have a place to start.  Collapsible shoulders make it easier to get garments on and off the form. The main drawback I found is that the wire cage at the bottom isn’t as nicely finished as the Wolf form,  and can snag delicate fabrics. You can cover the cage with muslin if this is a problem.

Roxy also sells online at roxydisplay.com. I have no experience with this company. One review I read rates them below PGM but better than the adjustable with dials. Foxy has forms with collapsible shoulders for $249.

Fabulous fit sells a molded foam version for $387 and a professional  model which looks like the ones at PGM and Roxy. The professional model sells for $887.  They also offer a kit of fitting pads for the bust, shoulders, hips, thigh, etc. You can purchase this separately. I found  the molded foam version at a garage sale for $25. I wouldn’t suggest these. There are better forms for less money.

Least desirable in my opinion are the forms which feature dials that allow you to adjust the bust, waist and hip. The base is lightweight and they tip easily; very frustrating when you are trying to pin or adjust a garment. The dials leave spaces which can be annoying to work around. I did cover one just to try and make it somewhat usable.

Now for the moulage review. I made three moulages for totally different figures and each one fit almost perfectly on the first try.  I found learning to take accurate body measurements the hardest part. My three drafts looked entirely different but each fit amazingly well.

Once you have your chosen form, draft and sew the moulage. I left the center front seam open when fitting myself and the center back open for fitting others. When you are happy with the fit, sew a final version in whatever fabric you choose for the cover.  I would advise a medium weight cotton or linen.  A natural fiber fabric will mold to the form easier than a synthetic. You want to be able to pull the cover tightly over the form so a knit is not suitable.

Here is my Fabulous Fit form ready to begin.

Fabulous Fit Form

Lower edge extended

I used cardboard to add 5 inches to the length.  She also needed minor surgery at the back armhole and a slight breast reduction. This was accomplished with a kitchen bread knife. Bra cups were stuffed and positioned on the form with pins. Since the neck was rough I draped a pattern to cover the neck and sewed it to the moulage before starting to pad.
Neck cover

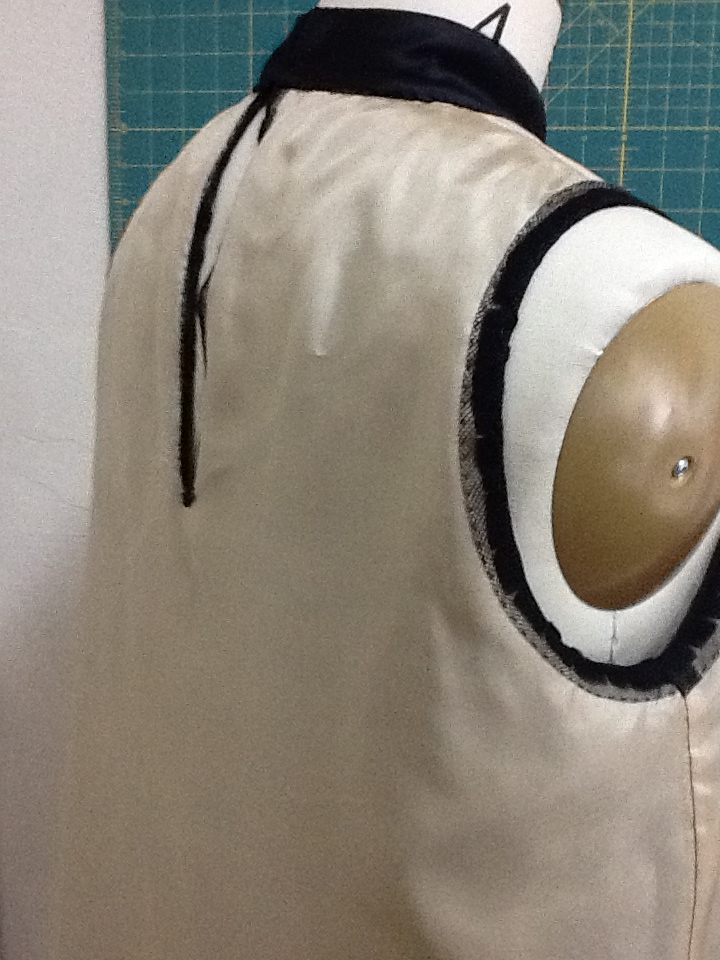
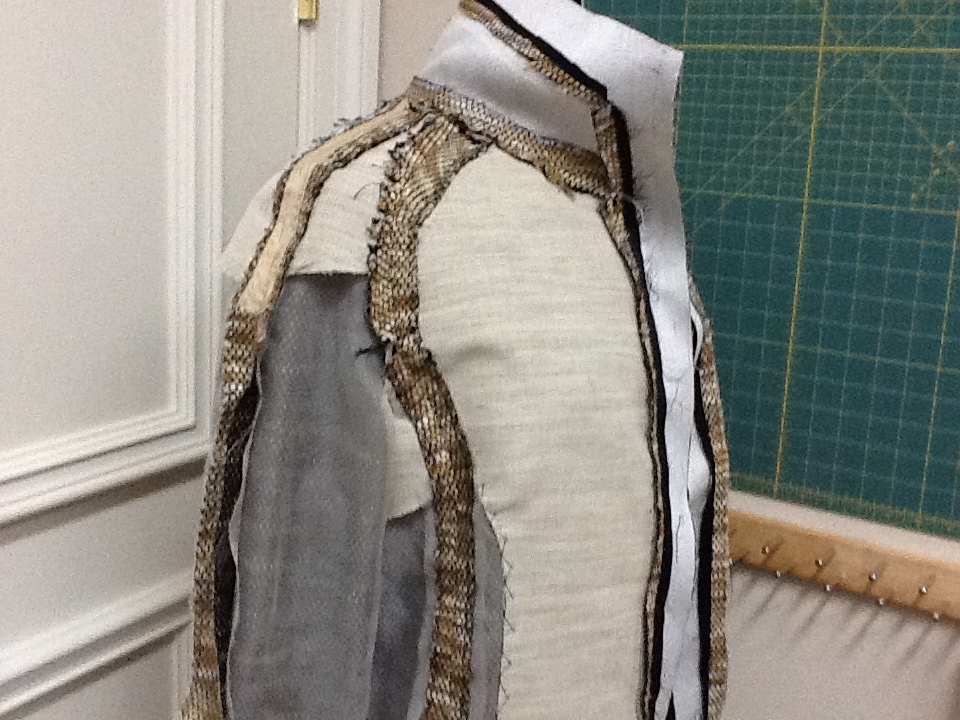
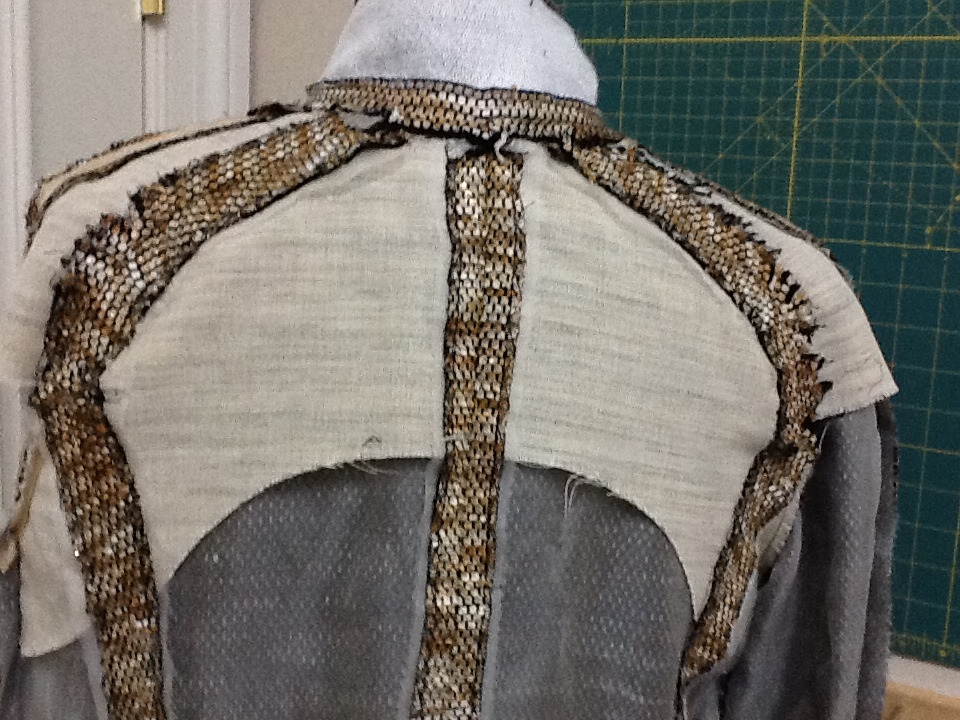
Notice the side seams are 3/4 inch wide and have been stay stitched. This makes it easier to turn and sew the sides evenly. The moulage is sewn together at the shoulders and armhole facings attached to neatly finish the armseyes. The side seams are left open. Also note the position of the armhole on the form and on the moulage. The form positions the arm angled backwards. The moulage reflects a more normal arm position.

Finished Moulage before padding

Start fitting the cover and padding at the top. Notice how the shoulders fit well but padding is needed to fill out the remainder of the cover. After the shoulders are fitted, position and pad the bust. You can use bra cups or a bra that fits well and you are willing to sacrifice it. Fabulous Fit also offers a kit of fitting pads but I did just as well using bra cups and shoulder pads.

Bust pinned in place
Continue to work your way down the form. I used a combination of shoulder pads, fusible fleece, heavy felt; just about anything you have on hand will work. Do frequent checks to be sure you are getting the desired shape. Pin in place and remove the pins as you add subsequent layers. I also used a steam iron to compress the padding as I worked.
Bumm shaping
I used two large shoulder pads to establish the bumm shape and refined it with upholstery batting. I also added a layer of upholstery batting as the final layer. Upholstery batting feathers easily and covers the irregularities. Take your time. It can take a few redos to get the shaping right but you will do this once and have your double for years.

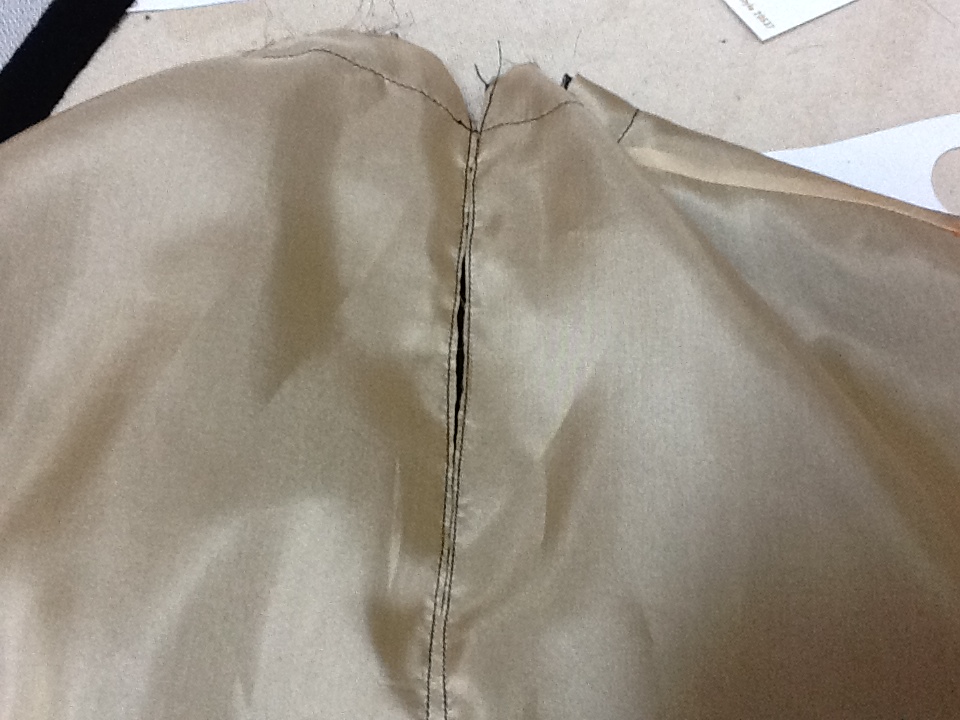
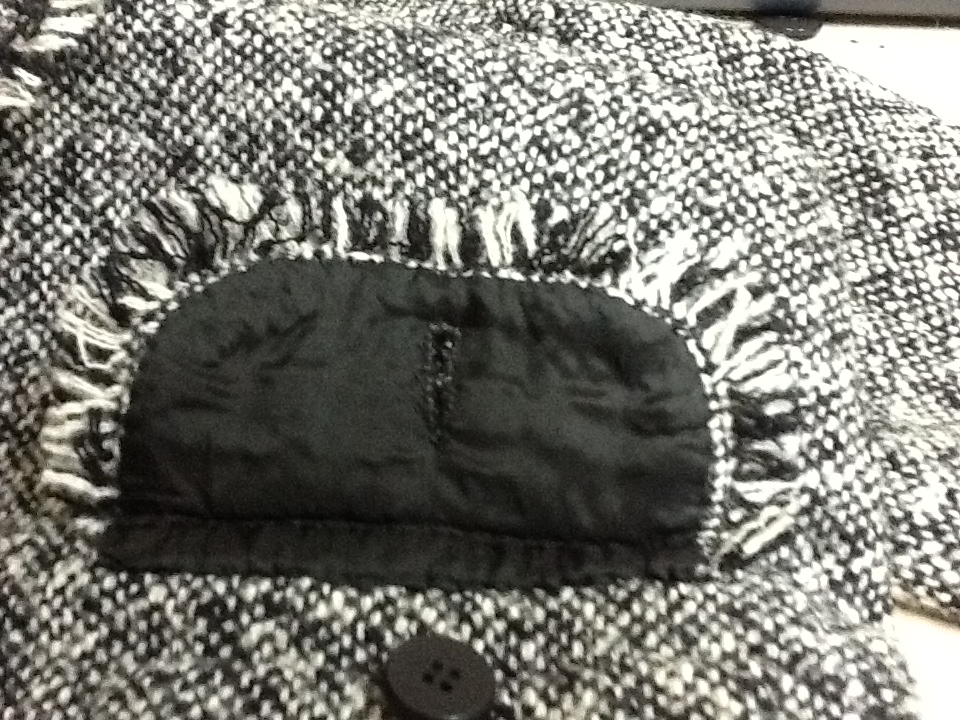
Once she is stuffed pin the sides together and do a final check that you are happy with the fit. Leave one side pinned while you sew the other side seam; otherwise the cover will shift. Fold the side seam allowances in and mark every inch to help keep the front and back aligned as you hand sew. I started at the waist seam and marked up and down from there. If you don’t put these guide points in and just start sewing you will wind up way off when you reach the end of the seam. Guess how I found that out?
sewing side seams
I find it easiest to start at the bottom and sew up. Use a 36 to 40 inch length of upholstery thread. You want enough to finish the seam but not so much the thread knots and is too long to work with. Why not just use a center back seam? First I found the padding shifted around too much when I tried to get a back seamed cover on and off. Also you need the side seams raised so they can be felt when you use this form for fitting and draping. Look at the professional forms. They are all finished like this.
Insert the needle about 1/8 inch from the folded edges keeping the needle parallel to the floor. Pull the thread tight (you want this seam raised) and place the next stitch about 3/8 inch away. I sew with my right hand and hold the thread taut with my left. You may need a clip or two at the waistline.

Finished! All she needs now is a heavy steaming to shrink the cover slightly.
finished

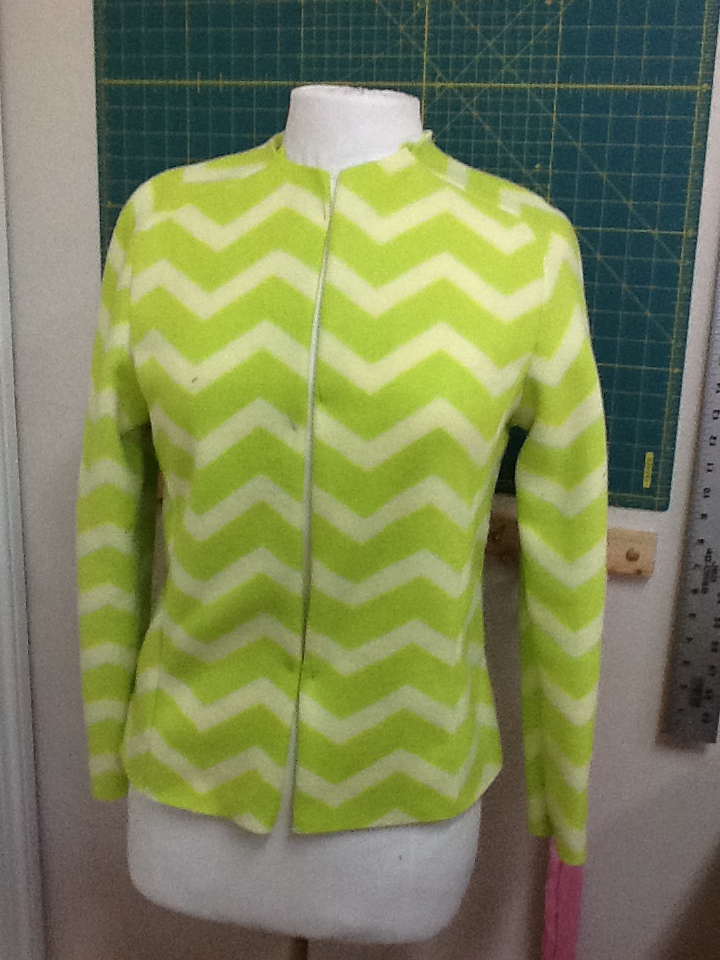
This custom cover was done on an adjustable form with dials. The figure was petite with a small bust. The moulage draft fit on the first try with one minor adjustment to shorten the front waist.
image

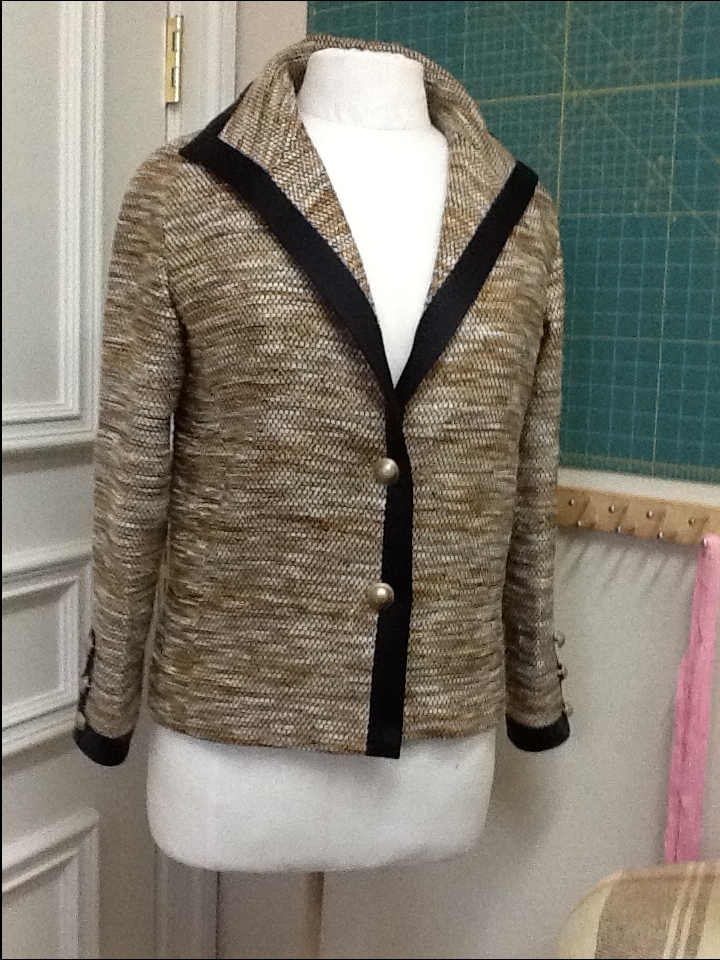
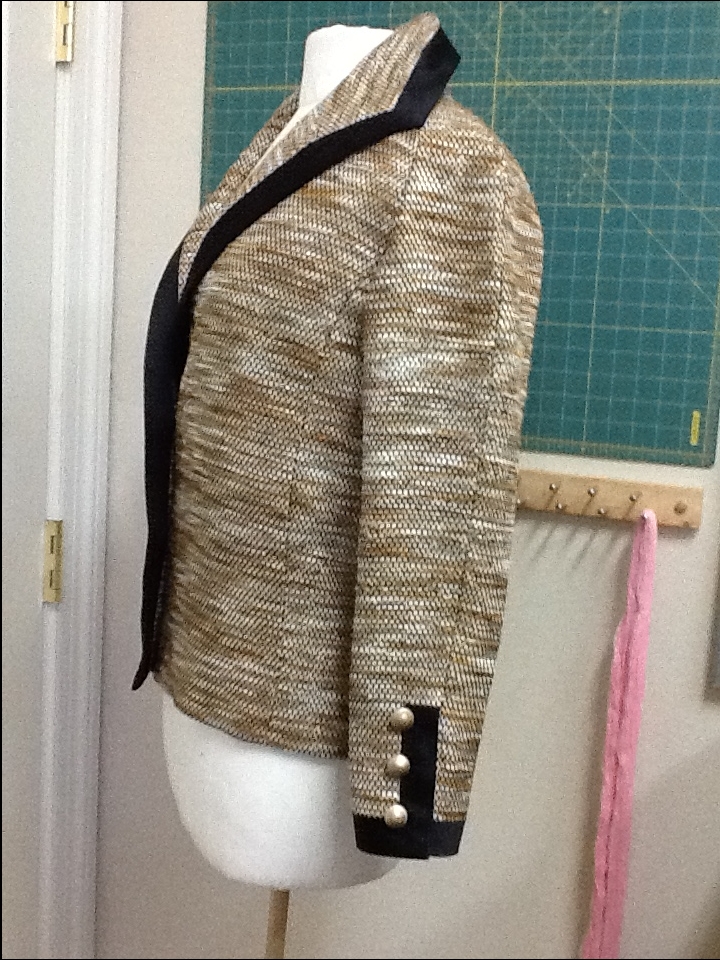
Another draft for a fuller figure with large bust and abdomen. Once again the moulage instructions produced a perfectly fitting mold.
image

If you want to make fitting much easier, invest some time to create your own double. I’ve done a few now and it still takes time but what a difference when I’m fitting garments!

Drafting Patterns, Dress Forms

Fitting for Couture

How do you fit yourself? Fitting another person is hard enough but doing it on yourself while looking in the mirror and getting stabbed by pins is impossible. One of the hallmarks of couture level sewing is perfect fit, so what to do? I decided to take a lesson from the couture houses and pad a dress form to duplicate my exact shape.
There are countless sites about making duct tape copies of yourself but most finished results I saw were not what I had in mind. A professional dress form is HEAVY and stable. I had messed around some years ago with the adjustable ones with dials, but they too are lightweight and tip over easily.  A custom made form is VERY expensive and not what I had in mind either. I was lucky enough to find a bridal shop closing its doors and bought a couple of their forms. If you decide to give this a try, get a size that fits your shoulders and body ABOVE the bust. I found that if the form is the correct size at the full bust it is usually much too large through the neck and shoulders. You can pad the form but you can’t cut it down. I usually sew a size 8 and found the size 2 form fit me at the upper body best. My back waist length is 2 inches longer, waist and hips larger but those changes are easy to do with padding.
Now I needed a guide as to where and how much to pad. I signed up for the Craftsy class, Patternmaking Basics: The Bodice Sloper with Suzy Furrer. This is definitely not a beginner class and does take a fair amount of time to work through, but her instructions of drafting a moulage were easy to follow and produced amazing results. Here is my completed draft. The toughest part of this was measuring the body correctly.
pattern
Next Suzy walks you through cutting out this draft into a skin tight moulage. Since I was fitting myself, I left the opening down the center front rather than the back. I can barely breathe and it looks a little wrinkled because I’m holding the camera but it does fit like a glove when I’m standing still.
Me in the moulage
I tried the moulage on my dress form and noted where and about how much to pad. I used non-bonded upholstery padding which tears very easily and allows you to feather out the edges. I also found it helpful to cut the cups out of an old bra and pin them in place to help shape the bust. Here is my girl with bra cups in place and partially padded.
bra cups
More padding until the moulage is filled out. This will take several tries but just keep shaping until the moulage is filled but not bursting. For my form cover I made another moulage from linen and added neck and armhole facings.
batting
I left the side seams of the linen cover open. The upholstery batting sticks to itself and the cover so it’s impossible to get it on smoothly if you leave just the back or front open. It also sews together better at the side seams. Pin both side seams closed before starting to hand sew the side seams. I marked the seams every inch and used these marks to help keep the cover aligned while whipstitching closed.
sewing closed
My completed clone. I added tape to the center front, back, waist, hip and bust lines.
completed me
Notice the different armhole angle on me versus the form. No wonder things didn’t fit.
armhole angle
Constructing this required several sessions of work but I’m very happy with the results. Imagine having a clone of yourself that stands still for hours of fitting and doesn’t mind pins. Please comment if you have questions or need sources.

couture sewing

Marfy Top Chiffon Version

chiffon topOne more version of the free Marfy top pattern before I retire it for awhile. I needed a simple black top for under suits and this seemed to fit the bill. The flocked silk chiffon is from B&J Fabrics in NYC ( bandj.com ). Using this fabric without lining was out of the question. I’m not into that see-through of a look.silk chiffon
I tried a layer of flesh tone china silk but wanted a softer effect.
chiffon and nude
Tried a black lining but that muted the dotted pattern too much. It looks much darker than the photo shows.
over black
Finally the right combination was to underline the dotted chiffon with a layer of plain black silk chiffon and use the nude chink silk as a lining.
three layers
I also chose to extend the shoulder about an inch for less of a cutaway armhole.
extended shoulder
I basted the two layers of chiffon together and seamed them using French seams. The lining was also stitched at the shoulders and sides with French seams. Baste all layers together before finishing the armhole, back opening and collar. I used silk tulle to create armhole facings. If you’ve never worked with silk tulle before it truly is a magic fabric. I use it to underline laces, stabilize seams and do loads of other finishes where you don’t want any added bulk. It is PRICEY and few shops carry it. It is available in black and off white but dyes easily if you need a special color. Expect to pay $125 to $160 per yard but I save every scrap as it can be used for so many things.
The tulle will stretch more in one direction than the other, (no need to cut it on the bias) so cut two pieces (one for each armhole) two inches wide and longer than the length of the armhole seam. Fold it in half and press. armhole shape tracing
I use a scrap of muslin and trace the armhole shape (no seams) onto the muslin with a waterproof fine point sharpie. You don’t want water soluble ink coming off when you steam. Then shape the tulle to match the traced edge. The folded side goes towards what will be the inside of the garment.
shaping silk tulle
Now you have a perfectly shaped strip to use as the armhole facing. Sew, understitch and press. Tack it to the lining being careful not to catch the face fabric.
facing basted
Inside of the finished top showing edge finishes.
tull binding
The back opening is a slit finished the same way with a narrow strip of silk tulle cut on the straight grain.
back opening
I completed the top with a velvet neckband, buttons and handworked thread loops. The fabric layers are joined together at the side seams with French tacks.
inside french tack
And the back view.
back view

couture sewing

Marfy 3182 Continued

I’ll give more info about changing the sleeve bands.  This is a long, detailed post so skip to the end if you would just like to see the finished photos.

I decided I would like the sleeve trim to extend to the vent rather than just a band encircling the hem. I chose black silk peau de soie for the trim on this jacket. Peau de soie has a satin weave and is moderately stiff so it will provide the support necessary for the collar and cuffs. The silk version behaves much differently than polyester so be sure you are buying the real thing.

sleeve trim layout - Copy

I made the trim slightly narrower than the Marfy pattern, decreasing the width from 1 and 3/8 to 1 and 1/8 inches. I also narrowed the trim bands around the neck and front to match.  Not a big change but I felt it looked better. Here is the new pattern with circles for the buttons so I can visualize the finished look. I use paper towels or shop rags for this. They are flexible,cheap, can be written on, pressed and don’t tear easily.

Completed pattern and marking the peau de soie trim. Cut it on the true bias so it curves smoothly.

satin trim layout - CopyI allowed 1/2 inch seams.  Cut 2 for the right side and 2 for the facing side. I allowed wider seams at the upper edge of the facing pieces so the sleeve lining can be sewn to them. Press on a quality fusible interfacing, also cut on the bias. Peau de soie curls like crazy but the fusible will tame it. I used satin weave fusible here.

peau de soie curling

Next take your pattern back to the sleeves. You will sew the underarm seam first. It’s much easier to work on this before the sleeves are set into the jacket. Now mark exactly where the trim will be and staystitch on that line.

staystitching first
Just a quick note about my serged edges. Sergers are generally a BIG no-no in couture sewing. I do use one for certain things. This fabric was so loosely woven it ravelled like crazy and I’m not sure hand overcasting would have kept it together.  I serge only the face fabric after basting to the underlining. This ensures the serging won’t distort the fabric. I use fine cotton embroidery thread, a three thread stitch and set to the longest length possible. This gives a very flexible fine edge and doesn’t destroy the drape of the fabric. Note how the underlining is turned back and I am only catching the outer layer.
serging
Next staystitch the trim exactly on the stitching line. Stitch only the inner edge; I will double check the trim width after sewing it to the sleeve and readjust my seam lines if necessary to have an even width band.first stay of facing
Now carefully line up your seams and stitch the long edge of the trim to the sleeve. Don’t cross seams; leave long thread tails and tie them off. You might not think this would make a big difference but it really does. Seams will press much easier and the garment won’t be stiff, especially where multiple seams cross. Takes more time but it really is worth it.
trim stitch 4
Work your way around the trim, stitching each segment after lining up the seams. Make sure you cross the corners at a sharp angle to give a clean line to the finished trim.
trim stitch 2 - Copy
finished first step
Double check that your bottom edge seam is an even width all the way around and remark if necessary. Now you need to apply stay tape to that bottom edge (remember this is cut on the bias) so your hem doesn’t grow. There are commercial tapes and some books suggest using the selvages of silk organza but I have found this too stiff. Make your own by cutting bias strips of china silk. Pin one end down to your pressing surface and pull hard on the other end while hitting it with a good blast of steam. You will feel the fibers release and stretch. Pin the other end down and let it cool. Steam and stretch again to make sure you have stretched it as much as possible. Don’t unpin until it’s totally dry and cold! You will have the best stay tape that’s fine, flexible and won’t show through to the right side. I cut 1/2 inch strips and wind up with stay tape about 1/4 inch wide.
trim stitch 6
One more quick pressing note. I dislike using a spray bottle as it’s tough to control where all that water goes; not good if you’re working on silks. I use a cheap chip brush and brush water on top of my press cloth exactly where I want steam, then press dry without using steam. Much more control as to where you are putting steam. Then weight the seam (I’m using an old, heavy iron, not plugged in of course) and let it sit until cold. Amazing how much flatter you can get bulky fabric using this technique.pressing 1
pressing 2
pressing 3
Now attach the facing to the lower edge. Notice how this is wider than the 1 and 1/8 on the right side. This gives me room to sew the sleeve lining high enough that it doesn’t peek out. Sew only the lower edge as I’ll show you how to turn the corner and get it perfectly sharp and straight.
sleeve facing 1 - Copy
Press the seam open and then turn all layers away from the right side.
turning corner 1
Now fold the right sides together keeping all the seam allowances to the wrong side.
turning corner 3
Stitch and press open using a point presser.point presser
Some books tell you to trim the fabric at an angle but I’ve found I get much sharper corners if I don’t trim anything. Insert a point turner or I use a pair of blunt end scissors or not too pointy knitting needle and turn the corner. Carefully work the fabric over your instrument until the fabric forms a sharp corner. Work carefully as you don’t want to poke through.turning corner 5
If the fabric bunches up and won’t cooperate turn everything wrong side out and try again. Try placing your turning instrument next to the inside of the right side and turning the seam over.

The completed sleeve:trim finishedAnd a closeup of the finished sleeve:

Cuff detail
Cuff detail

This side was just off. Notice the stitching line at the top of the trim is slanted.
mistake
I do try and fix these little details. Maybe someone else woundn’t notice but I know it’s there and it would bug me.  The top edge unpicked and restitched.
mistake fixedInside the finished sleeve with lining hand stitched around the vent.
inside ventI’m still not sure about the buttons. I need to wear this tonight and this was all Joann’s had. I tried black but everything had a rough surface which I was afraid would snag the peau de soie trim. Also undecided about whether or not to have the buttons contrast.  I’ll wear it for awhile and reevaluate when I can get to M&J or other source. Also, the front buttonholes are just openings in the seam which joins the trim band to the jacket. That makes them invisible; it was just a bit tricky getting all the layers to line up so the openings were in the same place on both sides. I then slipstitched all layers together around the buttonhole edges.

Photos of the finished work

finished 2
Collar worn folded down or flipped up.
finished 3
This pattern could also be made as a quilted unstructured jacket and I would make the following changes:
Eliminate the collar and trim
Raise the underarm an inch or so
Eliminate all facings and canvas interfacings
The front neckline might need to be raised/reshaped
Take at least an inch off the sleeve width.
Here is my test version in polar fleece and I think it will work out nicely as a quilted jacket.
test version
I liked the raglan sleeve lines on this and will try and get a quilted version started before too long.

Tailoring

Marfy 3182 Finished

front viewIn December I was lucky to have an unexpected trip to Paris and PROMISED my husband if I could have an outing at Janssens & Janssens (probably one of the most spectacular fabric stores in the world) that the my purchases would NOT wind up as collectibles.  Marfy 3182 was an ideal design for this fabric so this post is also a review of the pattern.

Additional views:

side view

Sorry for the blurry photo
Closeup of the fabric
Cuff detail
Cuff detail

I made a few changes to the pattern, although Marfy styles don’t usually need much tweaking. The jacket IS boxy, as the illustration shows.Pattern View

I chose to raise the front shoulder seam 3/4 inch at the front neck edge, tapering to nothing where it meets the armhole seam. The corresponding amout was removed from the sleeve.

altered front shoulderGreen thread shows the origonal pattern, red is the new line. I also removed an inch from the sleeve width. I underlined the jacket with washed silk organza which also provided a much needed layer to attach all the interfacing needed to support the lapels and collar.front interfacing

Hair canvas was inserted into the front, back, sleeves and underarm. Cut the canvas inside all stitching lines except the underarm seam; it is needed there to support the armhole. Catchstitch all interfacing to the silk organza underling being careful not to catch the face fabric. A back view of where the canvas is needed.

back interfacingI also added a layer of heavy silk organza to the collar to provide support but not add weight. This was loosly pad stitched to the under collar.

collar supportI changed the sleeve banding shape and will detail that in the next post as it is somewhat involved for anyone who wants to try it. The pattern went together easily and all necessary match points were clearly marked. The banding requires precise measuring and stitching but it all fits together if you take your time and align everything first.

lining up bands

More details in the next post.

Tailoring

Bias Fringe

This is in response to several requests for more detail on bias fringing after viewers saw my jacket in the Reader’s Closet section of Threads Magazine. I don’t have any more of the fabric used in the jacket available but have used a close substitute in these demos.

The pocket fringe is made by cutting 1 inch wide strips of fabric on the true bias. Staystitch 1/2 inch from the edge using a short (about 1 mm) stitch. Stitch again on the same line. You don’t want the fabric threads pulling loose. Use a knitting needle or tapestry needle to gently unravel the fabric along one side.Bias Fringe stripMeasure the outside edge of each pocket flap and make a strip of fringe long enough for each pocket. Sew the fringe around each flap edge rght sides together. Turn, press and fell stitch the lining to the wrong side. Trim the fringe to the finished width you want either with scissors or rotary cutter.

pocket

pocket underside

For the front lapel facing, cut a bias strip 6-7 inches wide and about 6 inches longer than the jacket front. You will need this extra length as the lower curved edge is treated like giant piping. Staystitch and unravel as before. At the top where the lapel makes a right angle, cut your bias at a right angle leaving extra to cover the underside of the neck facing.
lapel facing
Shape the bias strip to match the contour of the front lapel using a steam iron.
front jacket lapel
Turn the jacket seam under, slip baste, and sew the shaped lapel to the jacket. You won’t be able to ease all the fabric out at the lower edge where there is a curve. Sew a couple of darts in the facing to curve it around.finished corner
Red threads highlight where two darts are sewn to allow facing to curve.
facing darts
Hope this helps clarify the techniques used. Please leave a comment if you need more info.
I’m working on Marfy 3182 and hope to have that post ready tomorrow. Here are a couple of preview shots.
Marfy 3182
Marfy 3182 Jacket facing

couture sewing

Pleating Detail for Marfy Top

I’ve received a few requests to elaborate on how I pleated the front neckline of the Marfy top pattern. Here is the step-by-step process.

Full size muslin front

The top front cut in muslin. I’ve marked the seam lines. Starting at the center front, mark 1 and 1/4 inches away from the center front on both sides. Label both these marks and the center front “A.” Make another mark 1/2 inch away from “A” on both sides. Label this mark “B.” Another mark 7/8 inch away from “B” and this is also labeled “B.” Another mark 1/2 inch away from the second “B” and this is “C.” Finally measure out 7/8 inch from “C” and mark another “C.” Your top should look like this.
pleat 2
pleat 3

Now bring both “A”s together meeting at the center front.
pleat 4
Fold another pleat so the “B”s meet.
pleat 5
Then the “C”s. Do this on both sides of center front.
pleat 8
Finished pleating. Baste on the seamline. Don’t press flat. The inverted pleat at the center front prevents the fabric from poufing out too much. I liked this look better than gathers. I hope this make sense. If not let me know what is unclear. Thanks for all your comments.

couture sewing

Marfy Top

Here is my version of Marfy 1913, a free Marfy pattern offered on their website. Leisa from A Challenging Sew.com started a sewalong using the free Marfy patterns. Sarah on Goodbye Valentino.com is also following the sewalong and has posted her interpretations of the top. Sarah has also started the Ready-to-wear Fast and participants pledge to refrain from buying ready to wear clothing during the year. I figured it was a perfect opportunity for me to make a dent in my fabric stash.

I am a fan of Marfy patterns as they are expertly drafted and don’t have the immense amounts of ease that most patterns have. The styling is up to date and they don’t include seam allowances, which drive me batty. Once you get used to using patterns with no seam allowances, you’ll never go back.

I found a length of about 3/4 yard of an exqusite Leonard silk print in my stash which was perfect for the high collared, cutaway armhole top.

Leonard print
Leonard print

Leonard prints have a distinctive narrow border running along one edge. My goal was to incorporate the border as trim.

Trim edge of a Leonard print

The decorative border is broken by a white line every 0.5 meters and I had only about 0.75 meters so the trim would be limited. I decided to use it as a top border around the high collar and miter the edge. Since the border was along the lengthwise grain I wasn’t sure if I could curve it to match the pattern.

I disliked the fullness created by gathering the neck edge and decided that inverted pleats would give fullness yet lie smother. I experimented with the muslin and came up with the following measurments for pleating. There was 3 inches excess fabric each side of the front neck; total of 6 inches. The pleats took out 1 and 1/4 inches at the center front, space of 1/2 inch; then 7/8 inch taken out, another 1/2 inch space; another 7/8 inch out. Here is the redrafted front neck with pleating marked in red.neck pleats

I also decided to eliminate the back opening and close the neck with tiny self-covered buttons. I shifted the left shoulder seam 1 inch towards the front. This was accomplished by trimming 1 inch off the left front shoulder and adding it to the left back shoulder. This shifted the buttons slightly forward making it easier to button once on the body and also looks better than having the buttons at the exact top of the shoulder.

altered pattern all pieces

The collar pattern was also redrafted to shift the opening 1 inch forward of the left shoulder seam. I cut a full collar pattern from paper, taped it together at the center fronts and center backs and cut 1 inch forward of the left shoulder mark.

The collar was the most time-consuming part of this project. The border was cut, pressed under and steam shaped to match the curvature of the upper collar line. It was basted and then machine stitched into place. The top corner was mitered.

Shaping the trim with steam
Completed collar
Completed collar

I used the paper collar pattern to accurately stay-stitch the lower edge of the collar where it attaches to the blouse.

Staystitching along the paper pattern

To form button loops, bias strips of of fabric are folded right sides together and stitched about 1/8 inch from the folded edge. Stretch while stitching.  Trim the seam to 1/8 inch and turn. Pin one end of the narrow strip to your presing surface and stretch while steaming. You will have a narrow tube of fabric which is used for the button loops.

Button Loops hand tacked into place

Tack the loops into place allowing just enough room for the button to pass through. I used two on the collar and three on the shoulder. My buttons are 9/16 in diameter.

Armhole binding
Armhole binding

I used a fine cord to form piping around the armholes and finished the edges with a strip of black silk tulle which was doubled before attaching. After pressing the tulle was tacked at the shoulder and side seams. It stays in place with no further stitching. French seams close the shoulder and side seams. Rather than use elastic at the bottom edge, I opted to attach a band about 2 inches wide and pleat the excess fabric into the band.

Here is the finished product. This Marfy pattern can be as simple or complicated as you want. Made with plain seams, narrowly hemmed armseyes and a back slit opening, this can be completed in a couple of hours. The elastic at the bottom can be eliminated if you want to tuck it into a waistband or simply leave it loose. The pattern can also be a canvas for intricate details.

Finished Top
Finished Top


full length


Cloning Designer Garments, Lace

Finalist in the Threads Fancy Fabrics Challenge

My entry was selected as a finalist in the Threads Magazine Fancy Fabrics Challenge. Please visit http://www.threadsmagazine.com/item/35158/vote-for-the-winner-of-the-2013-fancy-fabrics-challenge and vote. The garment I entered was a modification of an Alexander McQueen top.

2013-12-21 22.00.38 - Copy

Back view. Notice the lace pattern is a mirror image on the right and left sides. This was a design element in many of Mcqueen’s designs.
2013-12-21 22.03.02 - Copy
The lace was backed with silk tulle and additional embellishment of crystals on the lace were added.
2013-12-21 22.01.59 - Copy2013-12-21 22.01.45 - Copy2013-12-21 22.01.22 - Copy
The garment as designed. I modified the neckline to be more wearable.
2013-12-11 08.27.40-1 - Copy

couture sewing

First Project of the New Year

I joined the Ready-to-Wear Fast on GoodbyeValentino.com. It is a pledge to refrain from ready-to wear clothing for this year. What a great idea and it will also motivate me to use up some of my ever growing fabric stash!
While in Paris and London over the holidays I couldn’t help but notice that everything was devoid of color. All black and white-everywhere!
20131225_222932
20131225_223011
20131225_223016
20131225_223121
20131225_223201 20131226_113513

I found a lovely piece of wool, angora and rabbit hair double cloth in my fabric stash and decided it would make a fabulous cape. Amazingly it was black and white. Double cloth is two layers of fabric, usually contrasting colors or textures, woven together. Seaming this fabric is time consuming but the result is a truly reversible garment. After cutting the pattern pieces, the edges of the fabric need to be separated. This can be maddingly laborious so I usually do it while watching TV. The fabric edges need to be peeled apart for a little more than double the seam allowance.
double cloth seam 4
Seam the face side of the fabric together in the usual manner. Press open. Then turn under both edges of the reverse fabric side and slip stitch.

double cloth seam 1double cloth seam 3

I wanted bound buttonholes for the front closure. The two fabric layers were peeled apart for about 3 inches along the center front. This gave me room to construct buttonholes. I like my bound buttonholes to be between 1/4 and 3/8 inch wide. Too wide and they don’t look professional. The lips of the buttonholes were formed from a single layer of the black fabric. On the facing side, I stitched a rectangle of white silk organza to the white facing side of the buttonholes. Turn and press and hand stitch to the reverse side of the buttonhole.

buttonhole closeup 2buttonhole closeup

Next was drafting a collar. I used scrap fleece which was the same weight and body as the double cloth. I draped a collar and will show the construction and finishing in the next post.
cape collar draft
This is how the cape is progressing.
cape with collar draft
A shot of the reverse side of the buttonholes.
cape buttonholes