couture sewing

Luxury Lingerie

I am on a ready-to wear fast for 2015, (hosted by Goodbye Valentino) participating in another year of refraining from buying manufactured clothing. Although underwear is allowed, I delved into the world of luxury lingerie.

Carine Gilson creates the most exquisite lingerie in Belgium. Pieces are made one at a time by artisans with prices to match. The Carine Gilson site has a button on the right for either French or English. Look under the “News” section and on the far right will be a video of her working in the atelier.

The line can be purchased at Nancy Meyer or you can just drool over the selections. Purchasing these creations would probably blow anyone’s clothing budget for years.

My first clone is a simple bias cut chemise which can be either a slip or nightgown. Bias techniques are from those used by Madeline Vionnet and explained in the book by Betty Kirk. The fabric is silk charmeuse and the lace is a French chantilly, both from B&J Fabrics.

Cut garment sections on the true bias allowing generous side seam allowances. The sections will stretch in length so don’t worry about extra at the hem. The side seams will narrow considerably, so allow at least 2 inches for seams.  I stay stitched the neck and armholes and draped on the dress form.

The secret to Voinnet’s garments holding their shape over the years was in allowing the bias to fully hang out before construction. She frequently weighted bias sections by hanging weights at intervals along the hem to accomplish this. I was concerned that the fabric might not hang evenly.  I created a weight which distributed the weight evenly along the bottom.

Take 1 inch bias tape and cut in about 18 inch lengths. Put two lengths together. Sew along the top edge. Sew along the middle. Then insert drapery weights along the bottom edge at both ends and about every 4 inches in-between. Slip a length of spiral steel boning in the bottom channel. I made 4 of these which will be enough to weight most garments.  The spiral steel distributes the weight evenly.

DSC_0552

Pin the weights along the hem. Allow to stretch for a day or two. You are encouraging the bias to fully stretch. As Voinnet said “the bias has done its work.”

DSC_0554
DSC_0553

Difficult to see in the photo are silk thread tacks along the center front and back lines. This ensures that the bias stays centered on the form. Don’t be surprised when the right and left sides stretch differently and you wind up with a 3/4 inch seam on one side and 1/2 inch on the other. This is because the warp and weft threads have different tensions. Remember, couture sewing focuses on the stitching line, not the cut edge.

After your fabric has had a chance to stretch, baste the side seams and remove from the form. I used narrow French seams. Now the fun of embellishing with lace. I cut around the scalloped hem and medallions, allowing extra fabric. Stitching the lace is done with a zig-zag stitch, about 1.4mm wide and 0.8 mm long. I tried two methods. One is using the Bernina BSR foot which allows you to move the fabric in any direction since the feed dogs are lowered. You can also use any free motion technique. I also tried leaving the feed dogs up and stitching with an open toe foot. All methods worked well, so choose the one you are comfortable with. Trim the excess netting after stitching is completed. Dovo lace scissors have a nub on one blade and are wonderful for this. They allow you to slip the scissors under the lace without snagging. Notice how the lace pattern is mirrored at the neck line. I noticed this detail on most of the designs.

DSC_0559
DSC_0558
DSC_0565
DSC_0566
DSC_0567DSC_0568

Luxury at a fraction of the cost!

Drafting Patterns

Back in My Sewing Room

Hard to believe that it’s been two months since my last post. November and December were packed with travel, holidays and family. After four solid weeks of house guests and entertaining, hubby and I escaped to the west coast for a golfing holiday. Palm Springs was the starting point as we worked our way north along the Pacific coast highway.
highway

Pebble Beach was spectacular but neither of our golf games warrant the fees there so we satisfied ourselves with pics from the 18th green.

Pebble Beach
We did play several spectacular courses along the way, including two which had hosted PGA tournaments. Sand everywhere!
golf course
Last year I joined Goodbye Valentino’s Ready-to-Wear Fast and did so again for this year so that meant no buying clothes for the trip. I needed warm, lightweight and breathable golf tops. I had a stash of merino wool knit fabrics; perfect and had the added bonus of being washable.

The pattern is my knit top block from Suzy Furrer’s Craftsy course.

top body block&amp

My obsession with sleeve fitting resulted in this draft, taken mostly from European Cut by Elizabeth Allemong.

sleeve block
Notice the shape of the sleeve cap and the position of the shoulder.
How to add couture touches to a simple zip top: match stripes at the side and armseye seams.
add a zipper guard which covers the zipper teeth at the neck
add a mock turtleneck
striped top
Serged seams were too bulky and anti-couture. I did serge the cut edges with Gutermann Skala 360, a super super fine thread which adds no bulk. My serger was set for a narrow three thread stitch. Seams were sewn ina regular sewing machine using a zig-zag stitch about 0.3 mm wide and 2.3 mm long. This very slight zig-zag adds stretchability to the seam. Press open. The sleeve and bottom hems were serged along the cut edges and hand hemmed.
striped top seams
For chilly California evenings, I was intrigued by the wrap designed by Julie of Jet Set Sewing. Look for the December 29 post. I had some off white sheer wool knit and made two versions of her design.

One short one:

short shrug

And a longer version with an asymmetrical hem. The hem idea came from one of the sweaters Julie photographed in a Paris window.
Front view
Side view:
Side view
Very simple pattern. I made mine 16 inches wide at the neck and 25 inches wide at the bottom. Cut two layers, one front and one back.  The short version is 19 inches long, the long version 29 inches before hem shaping.
Pattern
Sew the side seams using a narrow zig-zag stitch. I used 5/8 inch seams, pressed open, turned under edges and slipstitched for a totally finished seam on the wrong side.
Seams
The knit rolled naturally to the right side along the top and bottom edges. Stretch the knit gently and it will roll. I tacked in place lightly.
Shaping the hem for the longer version. Fold in half with the side seams together. The center front and back will be at the fold lines. I pinned a length of narrow elastic as a guide before cutting. Be sure to flatten out the curve at the center front and back unless you want points.
Hem line
Enjoy. I’m happy to be back.

couture sewing

Luxury RTW and More

To celebrate a friend’s birthday we did a “girls day” in NYC. Although none of my friends are sewers we all enjoyed the current exhibit at the Anna Wintour Costume Exhibit. The theme was “Death Becomes Her”; a display of mourning wear through the last couple of centuries. We were lucky enough to plan our trip for opening day and were treated to a private showing of the exhibit. My photos were terrible and no flash allowed; much better shots here. The moire fabric in photo 7 was spectacular.

After the museum we wandered our way up Madison Ave. and stopped in a very upscale resale shop. Chanel dominated the racks! Even at resale prices, my shopping splurge in Paris for Chanel fabrics looked like a downright bargain. I was able to get some shots of garments and even got inside a few.

Black Chanel Jacket

White Chanel JacketHoundstoothBlouse and RoseRose
I’m working on a clone of this flower pin. Here’s a back view.
Rose Back
Inside Houndstooth
The houndstooth jacket was lined only in the sleeves. Seams were turned so they were hidden by the lining. The seams in the jacket body were serged and turned under, making a very clean finish inside.
Blouse Back
The black silk blouse had a back neck opening constructed like a shirt sleeve placket.
Lining Seams
Seams, even in the linings, were generous. The garment sections had all been serged before sewing together; makes for easier alterations and with the generous seam allowances, the salesladies assured us that the jackets could be altered three sizes up or down.
Chanel Braid
Chanel braid looks like a bias strip of fabric frayed and sewn on as trim.
Valentino Ribbon
A Valentino design with amazing pleated ribbon detail. Crystal drops were sewn in between each pleat.
Zipper Finish
Even zippers were carefully finished on the linings.
Jacket Shoulder
The jacket sleeve seam and shoulder pads were impeccable and created the shoulder line Chanel is known for. Note how the shoulder seam is pressed open at the top. The shoulder pads have a unique shape. I managed to dissect a couple of different ones.
Pattern 1
Here is the pattern for one. These are not bulky, oversized pads but provide just subtle lift and shaping for the shoulder, Notice how the pad is constructed to extend into the sleeve and provide support. I tried to convert the pattern to a pdf file but the sizing got wonky no matter how I did it. I think it will print at the correct size if you just print the photo on a 8.5 by 11 inch sheet and don’t allow scaling. Let me know if this doesn’t work and I will email you the file, hopefully in the correct size.

I used cotton quilt batting. Pieces cut and marked with placement  lines.P1000229
P1000230
Mark the shoulder pad back and notches.
P1000231
Stitch piece 1 and 2 together. I used a 5.0 mm wide three step zig-zig stitch. Start and one end, butt the edges together and sew, butting the edges together as you sew. The pad will take on a curved shape.
P1000232
P1000233
P1000234
Section 4 will fold with the edges offset. Place the folded edge along the placement line on piece 3 with the narrower side up towards you. You want the layers to be graduated with the larger parts towards the outer side of the pad. Open the fold and stitch on the line. Fold back in place. Your piece should look like this:
P1000235
P1000236
Position sections 3 and 4 along the seam line of 1 and 2.
P1000237
Turn and place a few pins on the outside of the pad to hold the layers together.
P1000238
Stitch the darts closed on piece 5 using the three step zig-zag stitch. Place it on the underside of the pad.
P1000242
Stitch the dart in piece 6 and add it to the underside of the pad. Be sure the edges are staggered.
P1000244
Place the pad on a ham and steam. The steam will compress the batting and start holding things together.
P1000245
Using a length of doubled thread, stab stitch the layers together. Don’t pull the thread tight as you don’t want dimples in your shoulder pad.
P1000247
Add a line of stitches along the seam line where you have multiple layers. You don’t want this coming apart inside the finished jacket.
P1000249
Put back on the ham and give it a good steam to meld the layers together. The finished pad. Notice how it isn’t huge and gives support to the top of the sleeve.
P1000251
Another style I discovered. This one is even easier to make.
Pattern 2
Pattern 3
Sew pieces 1 and 2 together with the zig-zag stitch, matching notches. Notice how the neck edge is longer in the back.
Piece 3 is placed inside and then piece 4.
P1000253
Sew the dart in section 5 closed and place.
P1000255
Steam over the ham, stab stitch the layers together, and steam again.
P1000256
P1000257
Notice how the shoulder pad extends to the neckline seam.
A few readers have asked about adding shoulder pads to a Chanel style jacket. The jacket construction does not allow for internal pads, but you could cover a set with the lining fabric and tack them into the finished jacket. Some figures just look better with a little more lift at the shoulder.
I did see one quilted jacket at the shop. I couldn’t snag photos as it was carefully guarded by the salesladies. From what I could tell it was well within the skill level of many home sewers. The silk charmeuse lining was a vibrant print and the colors in the lining echoed the boucle. The trim was constructed using fibers from the jacket fabric.
We ended our “girls evening” with dinner and a painting class. We were required to purchase two glasses of wine during class so the paintings are being saved for an appropriate event.

Notes on downloading the shoulder pad patterns:
Printing directly from the photo won’t give you the correct size. Right click the pattern photos, save as a jpeg file. Open with a program allowing you to resize. You will have the correct scale if Piece number 1 measures 4 and 13/16 wide for the first pattern and 5 inches for the second.
P1000258
P1000259
I tried several pdf converters but nothing gave the correct scale. I’m open to suggestions if you have experience.

French Jackets, Tailoring

Jacket Finished, Plus Two More

The last step in finishing was to add pockets. I played around with different sizes and debated two versus four. A great way to visualize size and placement is to cut pockets from shop towels (they are heavier than paper towels) and play around until you get the right look.

P1000203
I had four larger buttons and decided to add them at the center front. They are sewn at the right front edge and don’t actually fasten.
I find it easiest to get pockets exactly the same size and shape by pressing the pocket around a cardboard template. I interfaced the pocket with bias cut interfacing which is cut just a tad smaller than the finished pocket. The bias gives the pocket a softer shape. I cut a slightly smaller template for the lining.
P1000172
Slip stitch the lining to the pocket, attach trim and slip stitch to the jacket. Don’t catch the lining when doing this.

P1000173
I had a chance to get a closeup look at some geniune Chanel jackets at an upscale resale shop on Madison Ave. and noted some distinctive details. Trims are applied after construction and are made to be removed if necessary for cleaning. More about my findings in the next post.
I was sidetracked by an request from my daughter-in-law. She was invited to join the hunt staff of our local equestrian team. Hunt staff wear red jackets and bespoke versions are a small fortune. Since I had made her wedding gown, she figured a jacket would be an easy task.
Just make a tailored jacket from a commercial pattern, right? Wrong. Riding clothing is another animal. We combined my research and her knowledge and came up with a punch list of what this garment needed.
*Roomy armholes with significant ease in the back to allow the rider forward arm movement
*Sleeves pitched much more forward than conventional clothing as the arm is held almost horizontal
*Abrasion resistant lining in the jacket skirt to resist wear
*Flared skirt with most of the flare at the back to cover the seat while in the saddle
*Warm lining as hunt season runs through the winter
*Slippery sleeve lining to allow the jacket arms to slide freely over shirts/sweaters
Mood Fabrics had a beautiful heavy wool/cashmere/nylon fabric. They also had abrasion resistant lining and wool flannel for the upper jacket lining. I drafted a fitting muslin from cotton canvas which mimicked the weight and drape of the wool better than lightweight muslin. Note the exaggerated curve of the sleeve.
P1000148
The roomy armhole. I would never have guessed this much ease would be required.
P1000151
The jacket fabric was thick and required loads of steam and heavy use of a tailors clapper to get things flattened into shape. I found it helpful to flatten the inside of especially bulky seams with a clamp from the hardware store. Get loads of steam into the fabric, clamp it down hard, and leave until it’s cold.
P1000149
Also, don’t sew across the layers of intersecting seams. You can get a much flatter press by folding the seam allowances to one side and end the stitching at the seamline. Fold the seam allowances the other direction and begin stitching at the seamline. The seam allowances will remain free and press much flatter.
P1000150
Inside the jacket showing the various linings used.
P1000153
The color of the upper collar is unique to the particular hunt club; her’s is purple. The fabrics were so heavy and it was applied with traditional tailoring techniques.
P1000170
Here’s the finished work.
P1000175
I couldn’t resist using the leftover fabric for a matching jacket for the one year old. Fittings were a bit of a challenge on a squirmy baby but we got it done!
P1000177
Mommy and daughter out for a ride.
P1000196

French Jackets

French Jacket: The Trim

Trim for the French jacket was slightly delayed because Elmo was needed at my grandson’s birthday party this past weekend.  When we asked mom what he would like for his party, she said, “He would really love a visit from Elmo.”

Hoping to avoid having to construct Elmo, grandpa and I made the party store rounds but everything looked so amateurish that there were really no other options. Off to JoAnn’s for yards of red fur.

There was no way that stuff was getting all over my sewing studio so the kitchen was set up as a workshop. Finally, after a trip back to the craft store for additional materials, Elmo materialized. He travelled to Florida in his own suitcase and made a grand entrance singing “Accidents Happen” from the Elmo potty DVD. Grandpa got talked into wearing this getup in 90 degree heat!  He did have one couture detail: spiral steel boning was used to keep his mouth from collapsing. It was the only thing that flexed in two directions yet held the shape.

Elmo

On to creating custom trim for my French jacket. Many of the trims available are simply too stiff and inflexible for this type of jacket trim. Many of the Chanel jackets I’ve seen have trims made from the fabric fibers and coordinate with the jacket.

I decided to try fringing bias strips. One layer looked too skimpy and two layers sewn together resulted in trim that I thought too stiff. The solution was to gather bias strips, compressing the fibers into a fuller fringe. This also produced a flexible and lightweight trim. I started with one inch wide bias strips cut from the jacket fabric. Leave the ends at at 45 degree angle; this makes butting them end to end invisible.
P1000145
Adjust the fullness. You could measure but I just pulled up the threads until the gathering looked even. Then steam pressed the bias strip flat.
P1000147
I fell stitched a narrow braid down the center. The bias strips were just butted end to end. Hand stitching controlled the fullness; don’t try this by machine. The feed dogs will push the fabric into all sorts of unwanted directions. Machine stitching is done after both sides of the braid are fell stitched.
P1000158
Using a zipper foot, stitch along both edges of the braid using about a 2mm stitch. This locks the fabric threads in place.
P1000155
Looked good but I felt it still needed something. Narrow silver snake chain was coutch stitched along both edges of the braid. Light grey thread makes the stitches almost invisible.
P1000157
The edges looked a little scraggly so they were cleaned up. I used a transparent ruler and rotary cutter to keep a consistent width. Fluff them up after attaching so the edges don’t look quite so neat.
P1000159
Attach to the jacket with a pick stitch using doubled waxed thread. Pick up just a thread or two on the right side and don’t stitch so deep you catch the lining. The stitches can be half an inch or so apart and will keep the trim in place just fine. Do this along both edges of the braid.
P1000160
Fit the outer edges of curves first and ease the inside curves.
P1000162
The sleeve trim was steam shaped before applying.
P1000163
Sleeve and edge trim finished.
P1000164
P1000165
P1000166
Looks good but I think I still need pockets; haven’t decided whether to use two or four. I usually do the trim one step at a time before deciding if the jacket needs more. One more tip. If you opt to use hooks and eyes to close the jacket, it stays closed better if you alternate them on each side rather than putting all the hooks on one side and all eyes on the other.
P1000167
I’m exploring other ways to do custom trims and have several other ideas in the works.

French Jackets

French Jacket; The Beginning

Now that my body double dress form and three piece sleeve research are complete it’s time to try them in action.

This is from my stash, probably purchased at B&J Fabrics several years ago. Now seems like a good time to get it made.  Another hallmark of couture construction is the shaping of garment sections with steam before any sewing takes place.  “Vintage Couture Tailoring” by Thomas von Nordheim has probably the best diagrams of how to shape jacket and sleeve sections.  Claire Shaeffer’s videos also explain the process well.

If you haven’t seen it, the video “Secret World of Haute Couture” is a great watch. It’s about 45 minutes and interviews some of the purchasers of haute couture garments. Although these ladies don’t sew they do understand and appreciate what haute is and how it feels. About 10 minutes into the film, one of the ladies who worked in haute couture for years explains, “You don’t just cut the fabric and sew it; you work the fabric. It is shaped with special irons so that when you roll it up, pack it, etc it still looks perfect.”  The importance of prefect fit is also stressed; “the clothing fits like a second skin; feels like you are wearing nothing at all.”

I used Vogue 8891 as a starting point. I reshaped the front princess seam so it would be easier to shape a rectangular piece of fabric into the proper shape.

P1000094
Trace the grain line about one inch from the fabric edge. Place your muslin pattern (no seam allowances) on top.
P1000095
Smooth the fabric so the grain line follows the pattern shape. You will notice ripples form; these need to be steamed out so the fabric is now shaped like the pattern.
P1000096
The same process needs to be done on the back sections.
P1000098
l
And all sleeve sections are steamed to further build in the shape.
P1000133
Although Claire’s pattern instructions don’t specify this type of shaping, notice that what was a curved quilt line now tends to follow the grain of the shaped garment sections. I spaced my quilting lines about 1 and 1/4 inch apart and followed the lengthwise grain on each section. After quilting I like to roll the raw edges of my lining sections under; it just keeps things neater.
P1000108
I cut the sleeves after completing and fitting the jacket body. Pins show match points. Most boucles do have a subtle pattern, so look carefully if you think yours doesn’t.
P1000134
Almost completed. Here is the jacket front and back. Notice how the armhole has been eased and tightened before the sleeve is set.

P1000138P1000139P1000135

I decided to shape the upper neck edge. An easy way to get a smooth shape that is symmetrical is cut a cardboard template. Press the neck edge under. Flip the template for the other side.

P1000136
Needs sleeve buttonholes and a good final press before I’m ready for trim.
P1000142
Pockets? Undecided yet. I’ll wait and see what the trim and buttons look like first.

French Jackets

Chanel and the Sleeve, Part 2

Getting a high, tight and well fitting sleeve is one of the key elements in a Chanel style jacket.  The three piece sleeve is designed to give that snug fit as well as place the vent a little more forward to showcase buttons and trim. My last post outlined how to go about converting a two-piece sleeve pattern into a three.  Another issue with most of the commercial patterns is that the armscye is rarely high enough and the shape of the sleeve cap doesn’t really fit that well.

I’ve spent the last month researching sleeve drafting. Never did I imagine it would lead to an intensive study of just about every method in multiple languages. Where to start? A website devoted to fairly advanced topics in tailoring is cutterandtailor.com. Most of the discussions of sleeve drafting referred to German systems which were complicated, difficult to translate, and I found the sleeve shape geared to mens’ tailoring.  The sleeves I drafted from these tended to be too wide and the sleeve cap too short. This site does have tons of valuable information about just about every tailoring topic. Numerous other drafting books produced less than perfect results.

The Mueller system got closer to what I wanted but placed the top of the sleeve cap too far forward. Finally!!! I found European Cut. This manual by Elizabeth Allemong is a compilation of the best French, German, English and Italian drafting techniques written in easily understood terms.  The system is far from quick and easy.  You will need patience and attention to detail but this is by far the best I found. I’m surprised it’s not more well known.

I decided to work with Vogue 8991, one of Claire Shaeffer’s new jacket patterns. It has a three piece sleeve so that part of the drafting work is already done.

Jacket Toile
I added my standard 1 and 1/4 inch to the waist length and decided to reposition the front seam. Otherwise the muslin fits perfectly. I’ve started using Osnaburg fabric, available at Joann Fabrics in the utility fabrics section, for jacket muslins. It’s heavier than regular muslin and since it’s 100% cotton, shapes easily. I wait for the discount coupon and buy 10-20 yards.

The sleeves were a different story. The pattern envelope shows fairly narrow sleeves but when I made the trial version they were much too wide at the hem and very long. The sleeve cap was also in need of reworking.

What I liked about European Cut is that the sleeve draft is based on the armscye of the garment, not arbitrary standard measurements. The sleeve cap is unevenly divided with the back width longer than the front. Since the back armhole of the jacket body is always longer than the front it makes for a better fit.  The front sleeve cap also protrudes more but the back cap curve is shallower.
Scye 8991
The scye shape from which a new sleeve shape can be drafted.

Pattern 1
The paper draft.

Pattern 3
The black outline is the pattern, red is the redraft, and green is the final draft. The sleeve cap needed raising 3/8 inch and underarm raised 1/2 inch. I also narrowed the sleeve slightly.

Sleeve Pattern Hem
I didn’t care for the flared hem so here are my changes to the bottom of the sleeve pattern. This fabric can be eased and shaped much more than regular muslin. I feel it mimics a soft wool better and gives a better read as to the final fit.

Shaped Sleeve
Completed Shaped Sleeve
Shaped sleeve ready to set.

Modeling Toile 2
I was on a mission to perfect these jacket sleeves and feel that the hard part is done.  Finally the fun of sewing this can begin!

French Jackets

Chanel and the Sleeve

The past month has been occupied with a quest to develop a sleeve pattern for the French boucle jacket. Chanel was obsessed with sleeves. Axel Madsen writes in Chanel: A Woman of Her Own: “she would pin up a dress as many as twenty times to get it right. Armholes were her bane-and the engineering secret of her jackets.” Jackie Rodgers, a Boston-born mannequin, would recall: the armhole was never high enough, and she’d reset a sleeve six times. The high armhole gave the jacket the cleaner, closer fit she wanted.”

Also, just some interesting notes regarding us sewers referring to our projects as “Chanel jackets.” I’ve read that Chanel takes a dim view of this and states that “only Chanel can make a Chanel jacket.”  True but Coco had somewhat a different take on those who copied her work.  Axel Madsen also notes that: “Coco had always believed that any fashion not adopted by a majority of women was a flop. To see herself copied in the street was the greatest compliment. Piracy was the flattering result of success.”

We may not be able to make a “Chanel jacket” but Gabrielle Chanel would have been flattered by sewers devoting endless hours to emulate her work.

In order to avoid the “home sewn” look, you need to get the fit of your jacket perfected, especially the shoulders and sleeves. Too many jackets appear that are much too large through the shoulders. Most commercial patterns have sleeves which are much too wide and the whole effect of the chic jacket is lost.

The three piece sleeve seems to be the holy grail of Chanel jackets. I found almost nothing published on how to draft this sleeve and so began my quest.

This post will demonstrate my method of drafting a three piece sleeve from an existing two piece sleeve. Future posts will explore custom sleeve drafting and some radically different sleeve shapes.

First I’ll deal with the armseye shape. The scye, as it’s referred to in professional tailoring language, is the basis for beginning the sleeve draft. If your jacket has the wrong shape and size armhole, you have no chance of getting a correct sleeve fit. Perfect your muslin fit and make any changes necessary to the sleeve before proceeding. You will also need to remove all seam allowances from the pattern. All professional pattern drafting is done without seam allowances. If you try this process without removing the seam allowances, things will become muddled very quickly. Sorry to those who prefer to work with seams added.

The scye shape is easiest to visualize by laying the jacket body sections on a grid with the armhole seams just touching and all grain lines parallel.

image
Here is an example of a poorly shaped scye. It is too narrow, vertical and doesn’t follow the natural shape of the arm. The armhole is also too low. Much better drafts look look this:
scye 7975
Vogue 7975
Chanel scye
The scye from a Chanel ready to wear jacket.
Scye 8991
Vogue 8991
Scye shapes overlaid showing the small variations.
Scye Overlays

I’ll use Vogue 7975 as the example of how to draft a three piece sleeve. This is a pattern used by many as the basis for their Chanel style jacket. It also has a two piece sleeve, perfect for demonstrating how to transform it into the coveted three piece draft. The McCalls pattern shows what to avoid. It should also be clear from these diagrams that substuting one sleeve pattern for another can be risky. Imagine trying to get the sleeve from Vogue 7975 into the McCalls armhole. Sleeves are drafted to correspond to a specific armhole shape and size. You might get away with switching the Vogue sleeves but even that might require some tweaking.

The first step may appear counter-intuitive, but I found it easier to return the two piece draft to a one piece and then draft the three. Altering and combining the two piece into three created multiple issues and this approach worked better for me.

Start by aligning the grains and have the seams just touching. Remember, NO SEAM Allowances.

Tracing Sleeve 1

Tracing Sleeve 2
Trace the sleeve cap shape onto paper, either gridded or plain. Stop the tracing at the underarm match point on both front and back. You should now have a sleeve that looks like this. Don’t do anything with the lower sleeve yet; all you want is the shape and size of the armseye seam.
Tracing Sleeve 3
Connect the underarms with a straight line. From the shoulder match point drop a line straight down which intersects with the underarm line at right angles. Make it a few inches longer than the sleeve length. Measure and mark the sleeve length from the top of the sleeve cap to the hem. Mark back and front as its easy to get confused until you’ve done this a few times. The back will be slightly wider than the back. I’ve written 6 5/8 on the back and 6 3/8 on front.

Now mark A, B and C as shown. Cut along the sleeve cap line.

sleeve cap points
Fold point C directly on top of point B and trace the underarm seam.

underarm line 2
underarm line 1
Fold point A directly on top of B and trace the underarm seam.
You should now have this:
underarm line 3
Measure out along the underarm line 1 and 3/8 inch left of B. Measure 1 and 1/8 to right of B. You are starting to form the undersleeve piece.

Next you need to draw in the bottom of the sleeve. Measure the finished width of the sleeve hem. Size 8 measured 8 and 3/4 inches.  The line down the middle of the sleeve is offset 1/4 inch towards the sleeve front; 6 and 5/8 along back underarm, 6 and 3/8 along front underarm. Therefore you need to offset the hem by the same amount.

Sleeve hem measures 8 and 3/4, half of which is 4 and 3/8. Add 1/8 inch to back and subtract 1/8 inch from the front.  Your sleeve hem will measure 4 and 1/2 inches along back sleeve and 4 and 1/4 inches along front sleeve.
sleeve hem
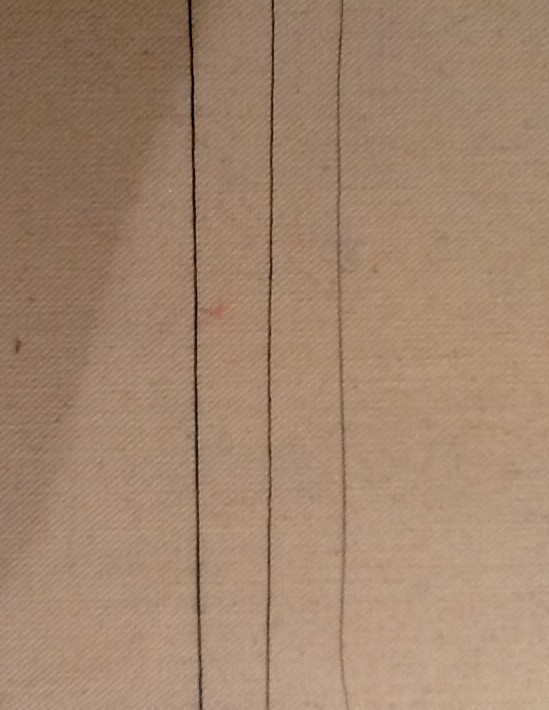
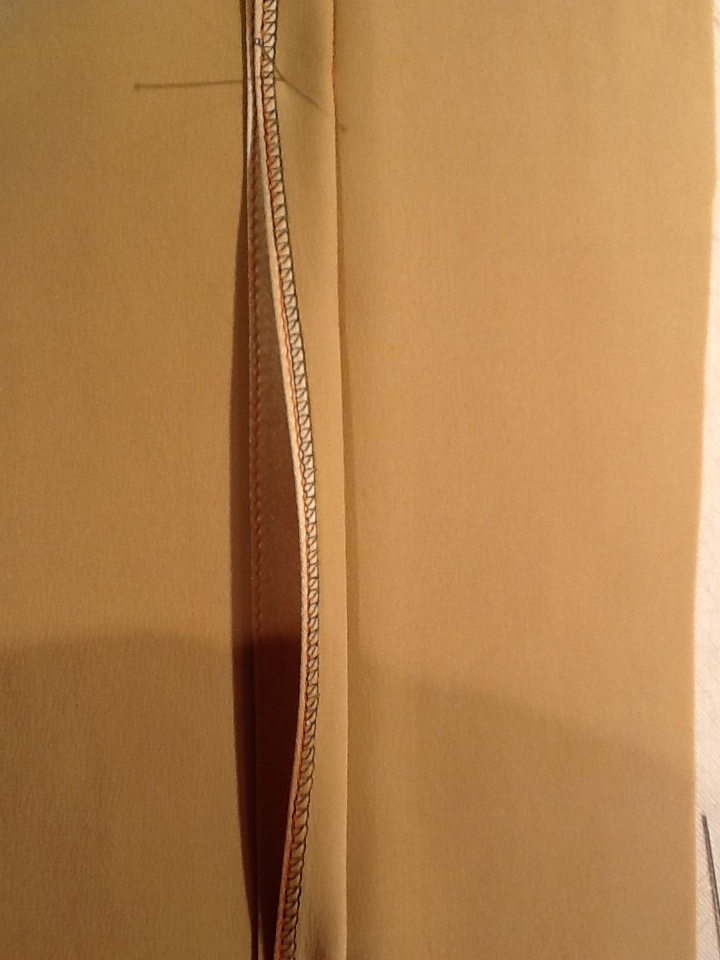
The sleeve needs to bend at the elbow to follow the natural shape of the arm. Every drafting source I found used arbitrary values to establish this bend. After measuring countless arms and sleeves I decided what made more sense was to duplicate the angle. A perfectly straight arm would have a straight line from top to bottom. Most peoples’ arms bend at about 175 degrees with the elbow as the pivot point. The dress form with sleeve showing this angle.
elbow angle on form
A Chanel sleeve from a ready-to wear jacket showing this angle.
elbow angle on chanel
This shows a two piece sleeve but the angle remained remarkably consistent with everything I measured. Therefore, I decided to draft the lower sleeve to reflect this angle. Draw a horizontal line where the elbow bends. Measure from the top of the sleeve. This measurement isn’t critical so just get close but don’t go crazy trying to find the exact point. This is the elbow line.
elbow angle
elbow angle 4
This pushed the seam 3/4 inch towards the right. In order to maintain the width at the hem, the center line and front seam needed to be redrawn 3/4 inch towards the right. Come straight down from the sleeve top, pivot at the elbow and continue to the hem.

To finish the under sleeve pattern measure out along the elbow line 1 and 1/4 inch towards the sleeve back (left of center) and 1 and 1/8 inch towards the sleeve front (right).undersleeve 3
At the hem measure 1 and 1/8 inch towards back and 7/8 inch towards front. Connect the points from the underarm line through the elbow line and pivot to hem. Your undersleeve should look like this. It is is red.
In order to complete the back and front upper sleeve patterns, the width of the undersleeve needs to be subtracted from the upper sleeve pieces. Along the back seam, measure in 1 and 3/8 at the underarm, 1 and 1/4 at the elbow and 1 and 1/8 at the hem.
Along the front seam, measure in 1 and 1/8 at the underarm, 1 and 1/8 at the elbow and 7/8 at the hem. These lines are shown in green.
upper sleeve draft
Add ease to the back upper seam to allow the elbow to bend. Measure down 3/4 inch from the elbow line and form a dart about 3 inches long. This will be eased into the seam. The seam needs to lengthened by the same amount so lower the hemline 3/4 inch and angle upwards to the front seam.

elbow dart


angled hemTrace off the under sleeve, shown in red. Be sure to mark front and back. The upper sleeve is for the RIGHT sleeve, the under sleeve is for the LEFT sleeve. This pattern gets flipped for the right sleeve. Don’t get confused. That’s just the way this draft works.

lower sleeve final
Trim the upper sleeve pieces along the green lines and along the center line. They can look similar so be sure and label them before you cut apart. You can also trace them to save your master draft.
upper sleeve final
Final sleeve draft.
completed sleeve Next will be a mock up to test the fit and adding a working vent. This post took hours to write and I hope not too confusing. I am going a little buggy now and hope it makes sense. Please let me know if any steps need clarifying and I’ll address questions in the next post. This was a while coming but I think most of the glitches are worked out. Next is custom drafting the sleeve cap.

couture sewing

Inside Chanel

Ever wanted to see inside luxury ready to wear and compare the construction techniques to yours?  Here is a glimpse inside a few pieces of Chanel and other luxury garments.  These aren’t technically couture as there are no fittings and they aren’t made for an individual client but some of the techniques are worth considering using in your sewing.

I found more hand sewing than in most ready to wear.  The hems are sewn by hand using a catch stitch. Jacket linings are completely sewn together before inserting but are hand tacked along the shoulders and underarm point.  The jump pleat at the hem is slip stitched by hand.

Chanel Hem

Closeup view of the jacket hem. Notice the hand stitching and how it is placed.

I noticed loads of serged edges. All garment and lining pieces are individually serged along all sides(except the armhole seam). In couture sewing, sergers are generally a big no-no. Raw edges are hand overcast but how time consuming is that! The difference is that an extremely fine thread is used; no wooly nylon or what is sold as serger thread.
Chanel Dress Pieces
The pockets and pocket flaps on this Chanel dress were slipstitched by hand. They are removed here for alterations.
White Jacket
Pink Chanel Overlock
Here is a Pucci dress using the same fine thread to finish the seams.
Pucci Dress
Also note the wide seam allowances. Most are at least 3/4 inch and some are 1″ to 1 1/4″. Linings have the same generous seams.
Chanel Lining Overlock
So what kind of thread and where to buy? Oshman Brothers in NYC is one source. You are looking for Gutermann Skala U81. I also have the U151 which is slightly thicker but the U81 is the thinnest thread I have ever seen.
Thread
The thread on the left is Gutermann 100 sewing thread, middle is Skala U151 and right is Skala U81.
Another source is Bergen Tailor Supply.
Also you need to set your serger for a narrow three thread stitch. On mine this is done by removing the left needle and using the three thread narrow hem but loosening the tensions. You’ll need to play with your serger settings and once you discover what works, write it down. I have it on a post-it note next to the machine.
For unlined garments I noticed the edges were serged, turned under and stitched. Here is a test on silk charmeuse using the Skala U81 thread.
Serger Sample 1
The serged edge is turned to the wrong side and edge stitched.
Serger Sample 3
Finished seam pressed open. Put strips of brown paper under the seams to prevent any press marks on the right side.
Serger Sample 2
This seam finish wasn’t limited to silk blouses. Here is an unlined Chanel jacket of silk and linen check. The jacket seams were serged, turned under and stitched. The sleeves were lined to make the garment easy to slip on and off.
Chanel Plaid Unlined Jacket
Sleeves are a whole topic of their own and I will delve more into that with the next post. Interesting the way the top sleeve seam is pressed open for about two inches each side of center at the sleeve cap. The armhole is stayed with narrow, lightweight bias tape and the shoulder pad incorporates a sleeve head.
Chanel Shoulder Pad
Exploring the Chanel shoulder and armhole led to a self-taught course on sleeve drafting, fitting and how to achieve that high, slim Chanel sleeve. More about that to follow.

Meanwhile I did manage to get Style Arc Franki dress finished and incorporated some of my new-found finishes.
Style Arc 4

I used a linen knit and lined with bias-cut silk charmeuse. The lining extended to the armhole edges where it is fell stitched, eliminating facings. I used the fine overlock thread for seam finishes and also used it for a slipstitched hem on the silk lining.
Style Arc 2
Style Arc 5
Hope you enjoy. Mary

couture sewing, Dress Forms

The Dress Form in Action

Here it is, the first dress created with the help of my new custom molded dress form. This would have been next to impossible to get right without the help of a perfect body double. Much of the work took place on the back. I needed a semi-formal dress for a destination wedding in the Bahamas. The bride requested all guests wear white. Although the ceremony was beachside, the reception called for semi-formal attire. Try buying something that fits that bill.

Ceremony on the Beach

I created a version of the Dior design worn by Nicole Kidman some years ago. I thread traced the seam lines into white 4 ply silk crepe and embroidered floral designs on the front using multiple hoopings. Since embroidery can cause the fabric to shrink and/or pucker, check the seam lines against the pattern after all embroidery is finished.Full Length View


Silver metallic mesh was positioned on the back and I printed templates of the embroidery designs on transparent film to finalize the design. The embroidery designs were placed to create a picture frame effect around the metallic mesh. The mesh was somewhat stretchy and having the dress on the form made getting the placement so much easier.

Back View

Another view of the back with skin toned fabric underneath. The zipper is hidden in the left side seam.

Back EmbroideryLiningAs this was to be worn in the tropics, I chose a fine Swiss cotton jersey for the lining. This was comfortable to wear and provided opacity so that the hot pink skirt lining did not show through. To attach the lining I put the dress on the form inside out and fitted the lining around the neck, armholes and back.

Back Lining

Finally a hot pink lining for the lower skirt which shows when walking.

Skirt Lining

dress 5

This is entered in the SewStylish Spring fashion Challenge at Threads Magazine.